Food, recipe, wine

Simple Bolognese Sauce

We aren’t Italian but my Mom loved to cook all sorts of cuisines, not just curry. And one distinct food memory I have is making sauce with her. She called it a sugo and it always started with a “trilogy.” My job was to stir. And stir. And stir. And stir. Once I mastered stirring I was allowed to chop and dice. But then straight back to stirring (and tasting). Now this simple Bolognese is a go to recipe for me. I also usually have all the ingredients, except the meat, already in my fridge and pantry so this involves very little planning. But let’s start with my Mom’s “trilogy.”

IMG_8550

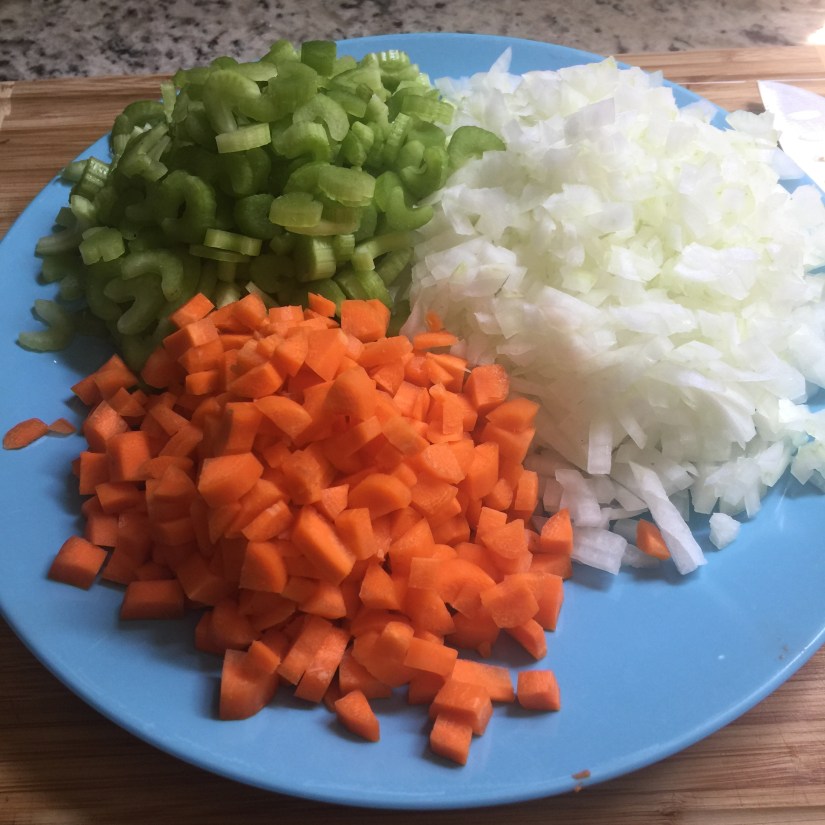
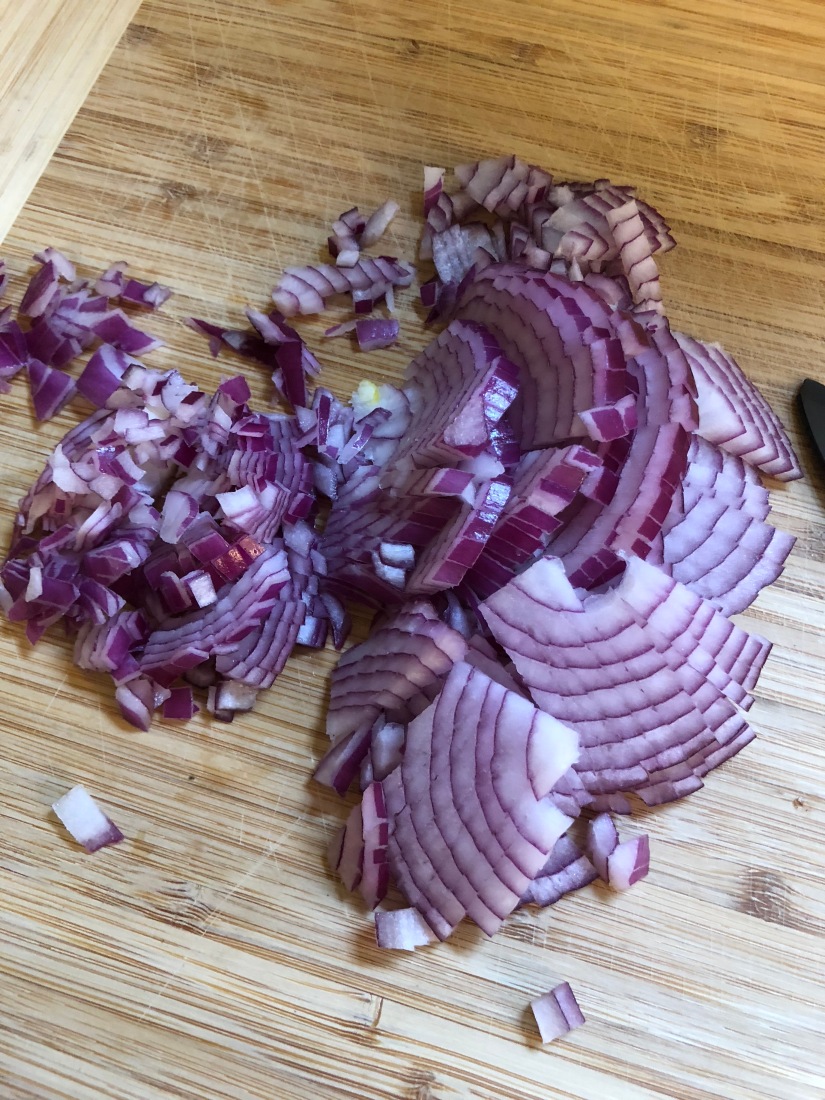
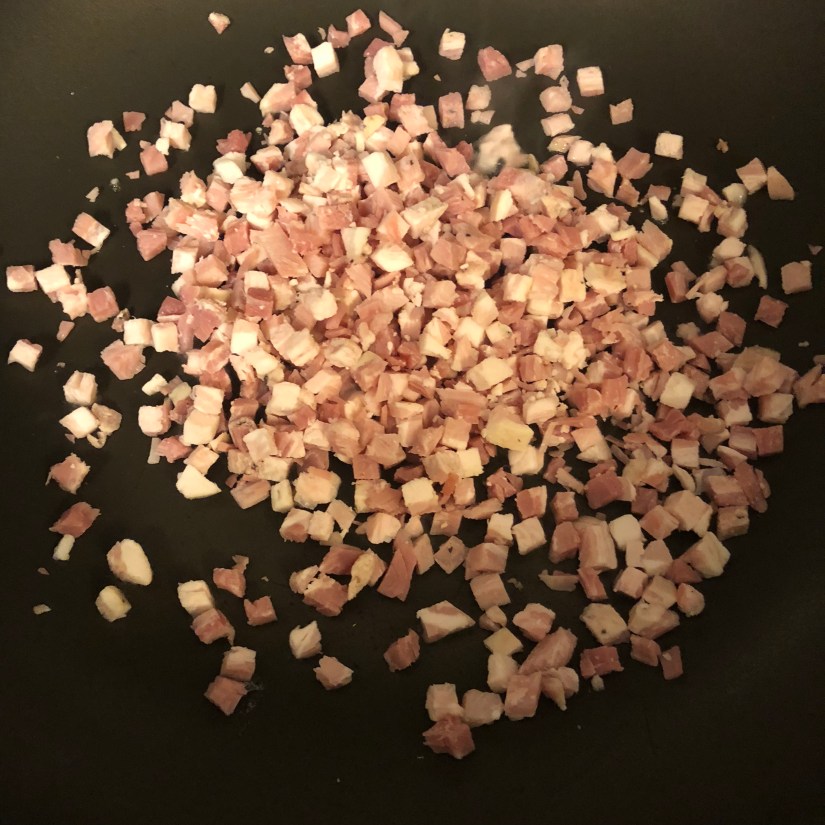
What she called a “trilogy” is more commonly know as a cooking holy trinity, the French term for this mix is a mirepoix, in Italian it would be a Soffritto. The essential goal is to slow cook, not brown or sauté, diced vegetables, and occasionally herbs. Depending on the cuisine your vegetable medley will change accordingly. For instance, a Cajun or Creole holy trinity is onions, celery, and bell peppers. Today we are sticking with carrots, celery and onions. You generally want the onions to be roughly equal  to the carrots and celery combined. I ended up chopping half a red onion as well to get the correct balance.

0mpftsYhQaK%QJ%O6l6xeg

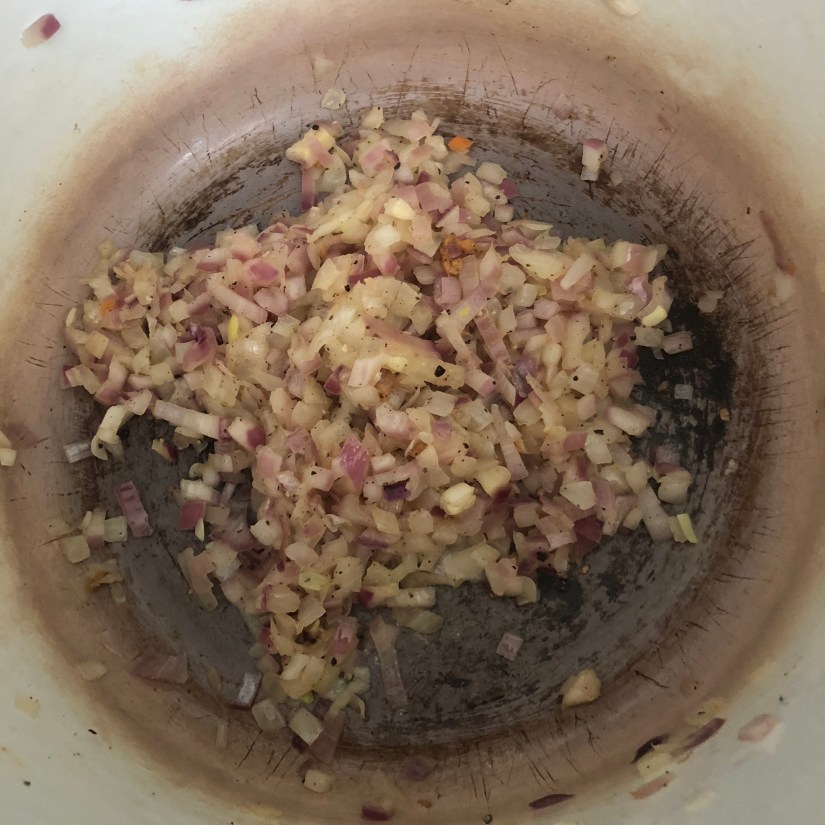
The key here is to let them cook on a gentle heat, you don’t want these to burn, sauté or cook to quickly. This usually takes about ten to fifteen minutes depending on how thick your pan is, how low your heat is, and the size of your dice. With practice you will begin to have a feel for how long it will take in your kitchen and not have to hover over your pan so much. Just before they would start to caramelize it’s time to add in your carrots. Let these cook for another 10-15 minutes and then add in your celery and let them cook for an additional 10-15 minutes. If you notice that anything is beginning to stick a splash of chicken stock will deglaze your pan. I also throw in a pat of butter before I add my meat. This will help balance out the acidity of the tomatoes at the end.

0Ae71HNJQKeyt3j9otW1RQ

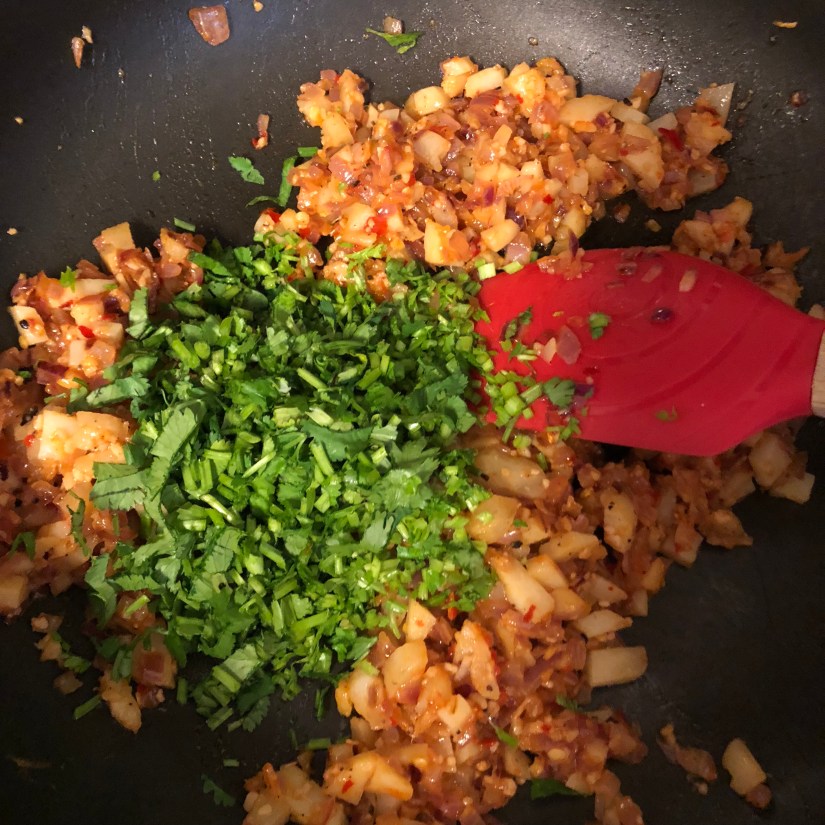
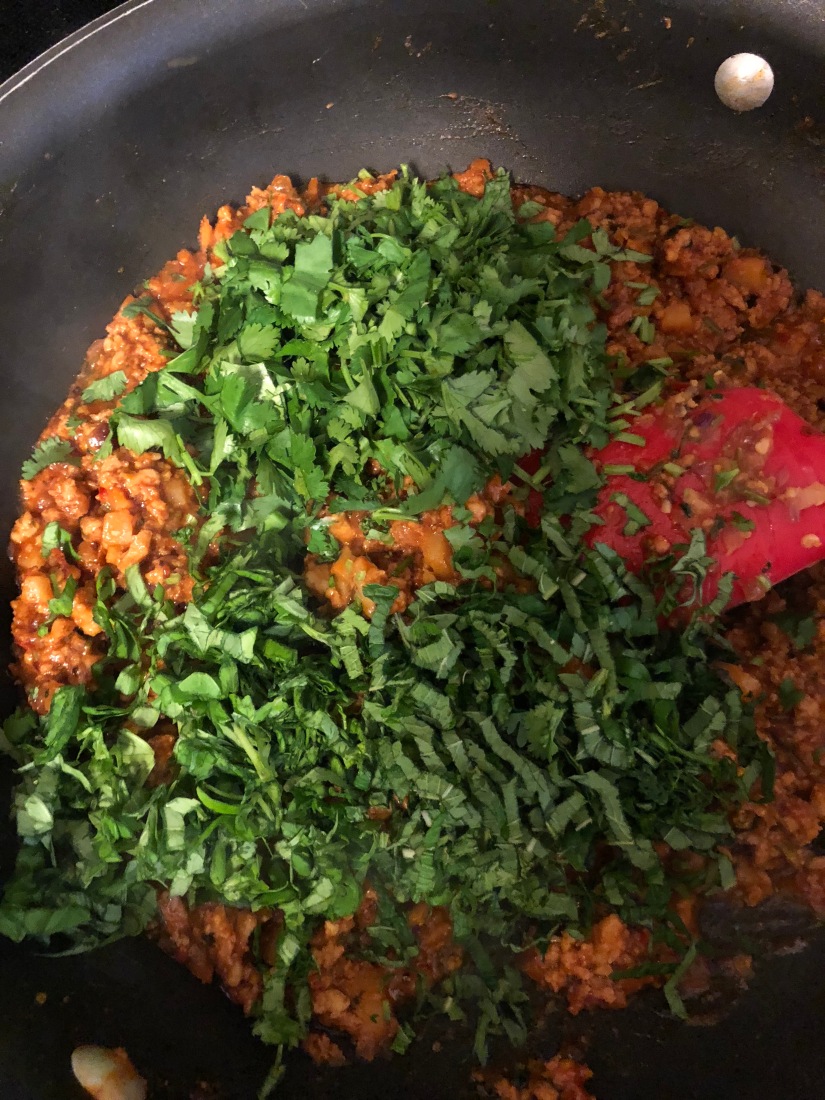
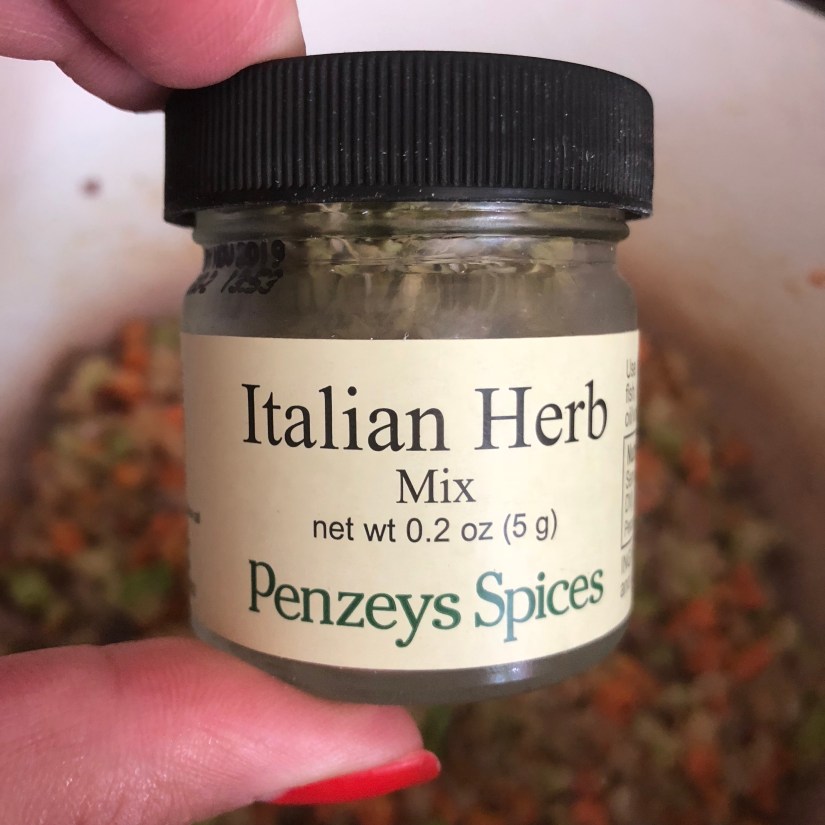
While your vegetables are cooking you don’t want to forget to season. You want to add salt and pepper every time you add a new item into your pot. If you are into garlic, like I am, then you should also add a sprinkle of garlic powder. If you are into a nice round heat than a sprinkle of crushed red peppers won’t do you wrong either. But the real pièce de résistance is the Italian Seasoning you chose to use. I have made this sauce with fresh herbs before and it just didn’t work. The long stewing caused the herbs to leave a bitter aftertaste in your mouth. I’ve made it with cheap seasoning and it took the whole bottle and the flavor was never quite right. A good spice blend is worth the investment. When I don’t make my own I use Penzeys Spices. We are lucky to have one in RVA and they have a great online store as well! This Italian herb mix came in their Soul Box.

g8Nt5WqHT42sCdAGA6YSgQ

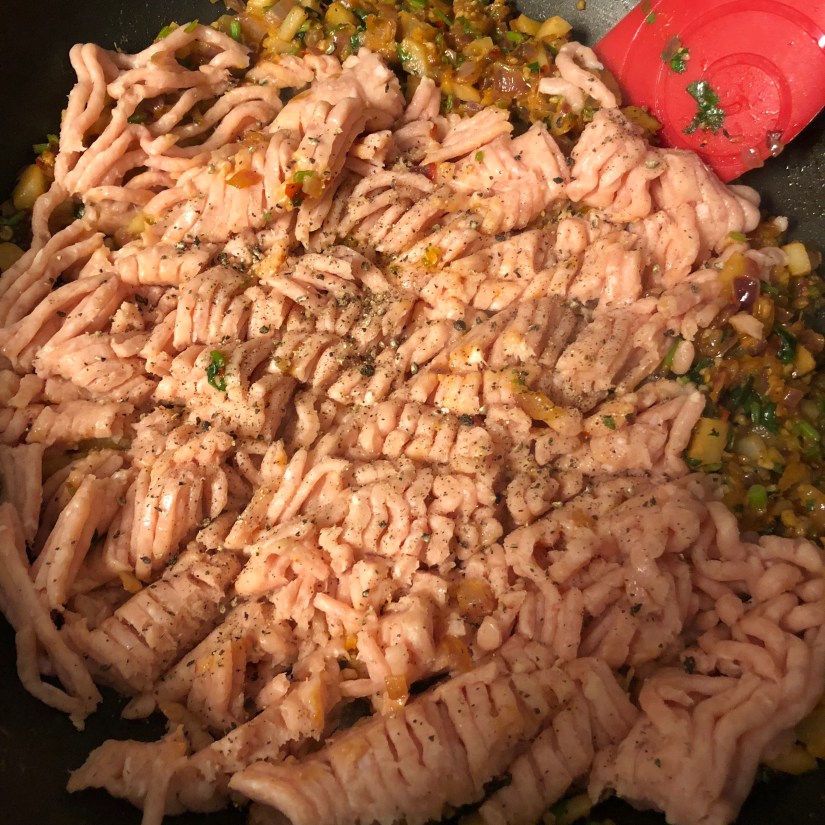
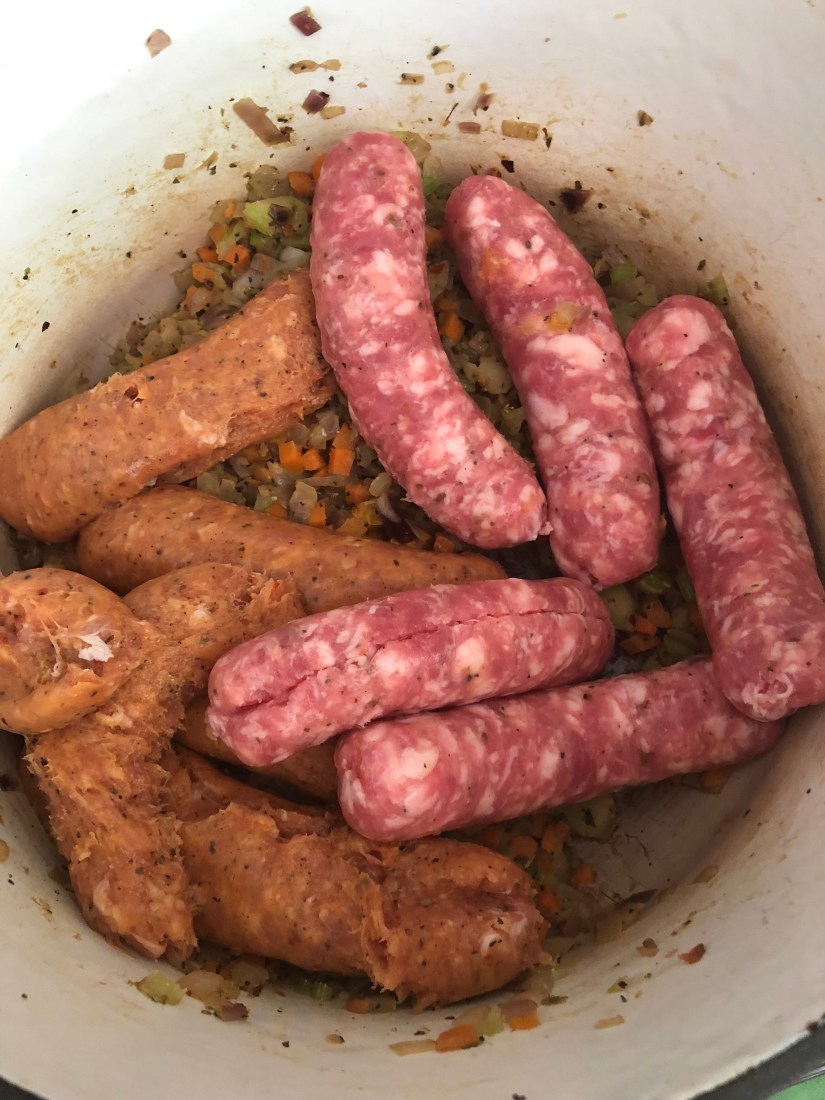
Since this is a meat sauce it’s important to buy the right meat. I like to use a combination of pork and chicken sausage. I’ve made this with beef before and just found it overwhelmingly oily despite how assiduously I drained and skimmed the fat off. And with plain ground turkey or chicken it doesn’t quite hit that requisite richness you are looking for.

Pn6+1gYzQu+dxhq3YWGs3w4w8ZG1OzSFyOgt5XL9lOTw

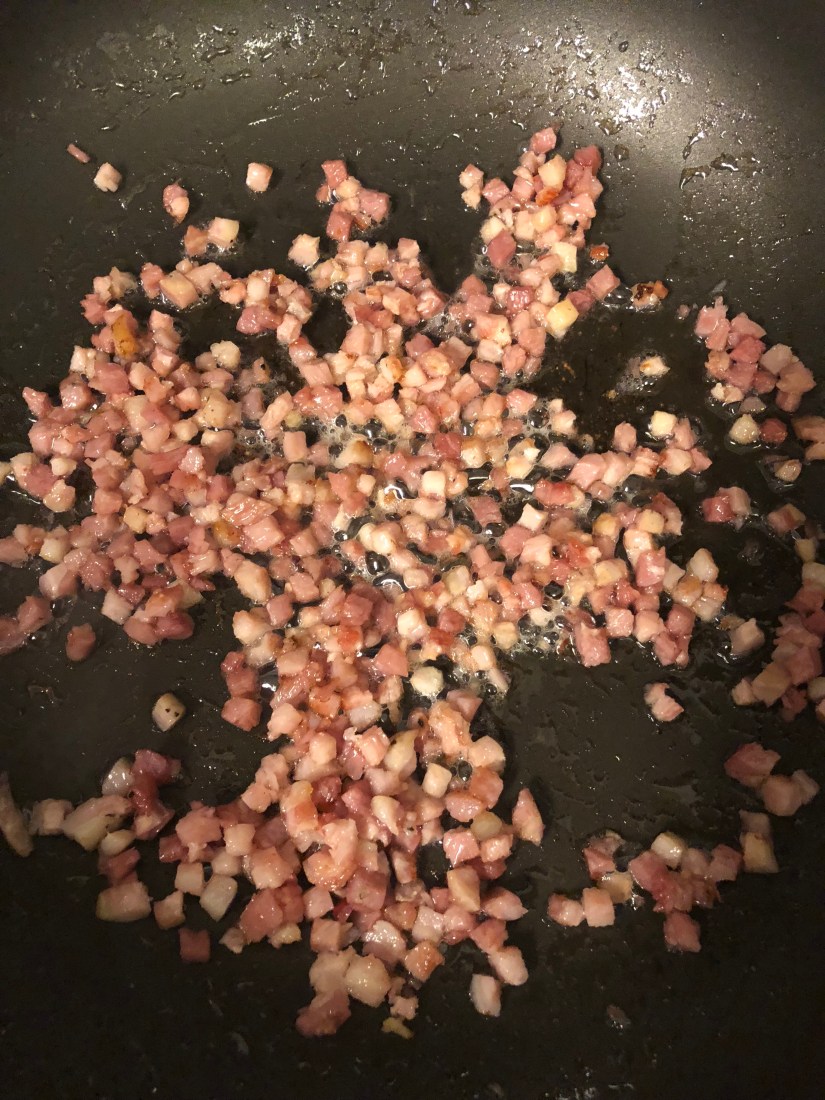
I uncase the sausage and throw it right into my pan and incorporate the cooked vegetables and spices into the meat as it cooks. You could mix the two meats together in a bowl and then transfer it into the pan. But this is an extra step and dish that can be avoided. Make things easier on yourself!

NCYpNtiPTAGc3aBtqn9yoA

It actually is quite easy to smooth into one homogenous mix. Although if Lloyd is loitering I usually ask him to do this part by complaining that it makes my wrist hurt. But it really is important to get everything well mixed.

uzmwaj2bRBqr19nBxyjCkQ

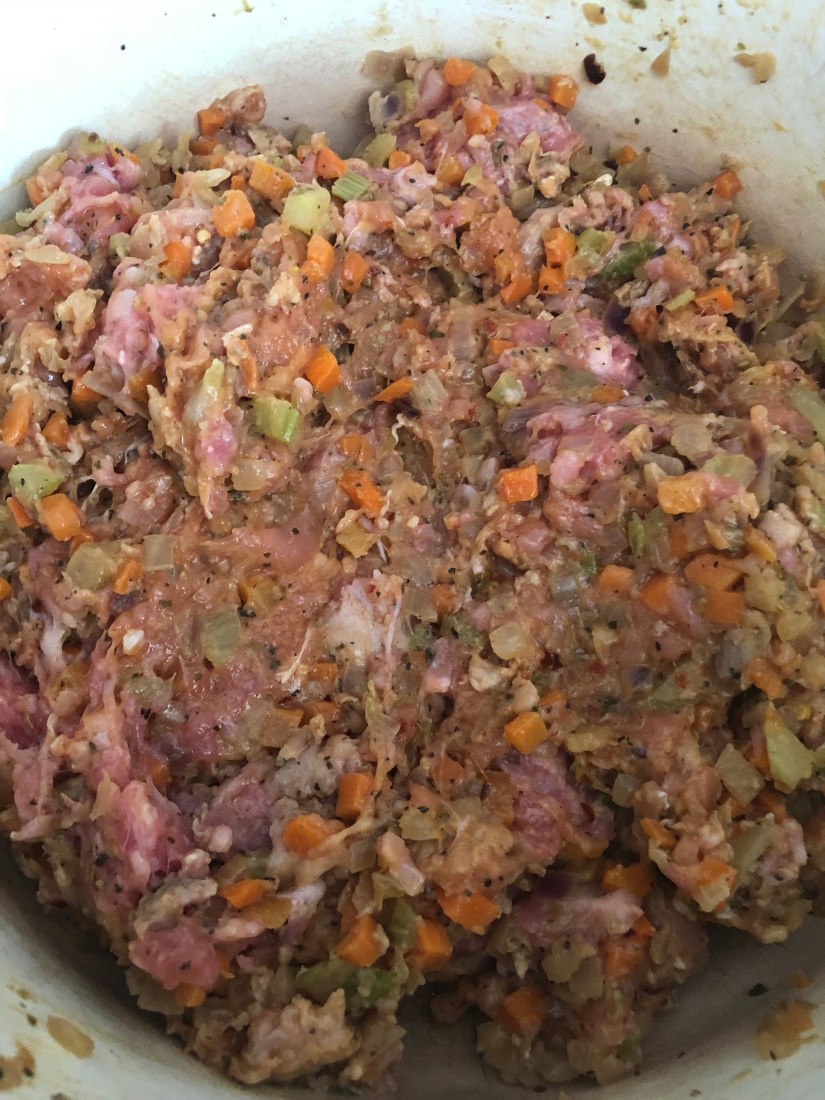
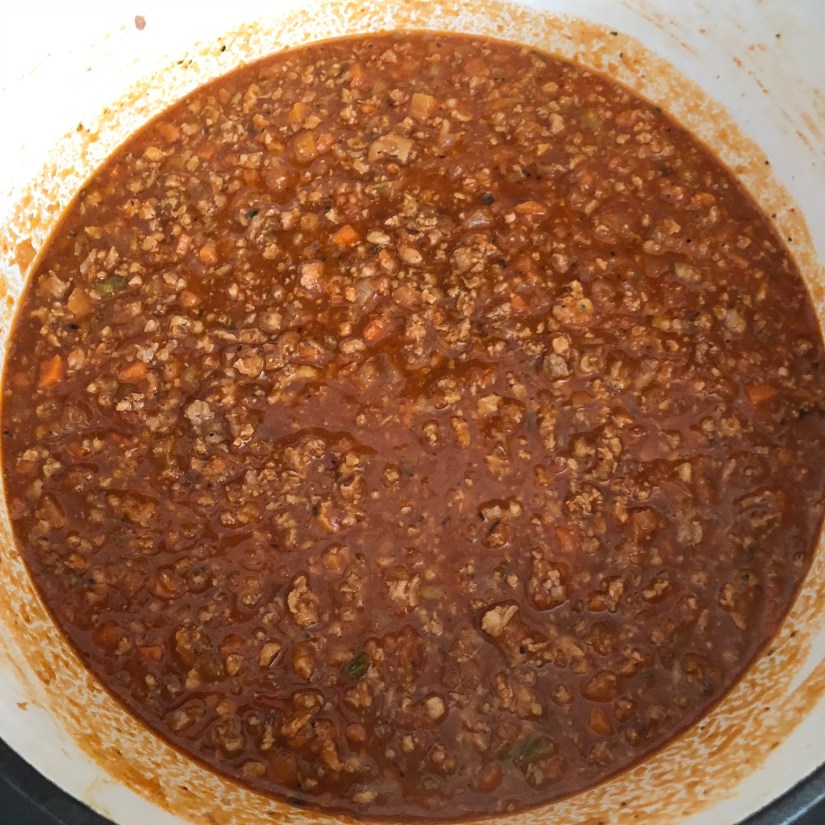
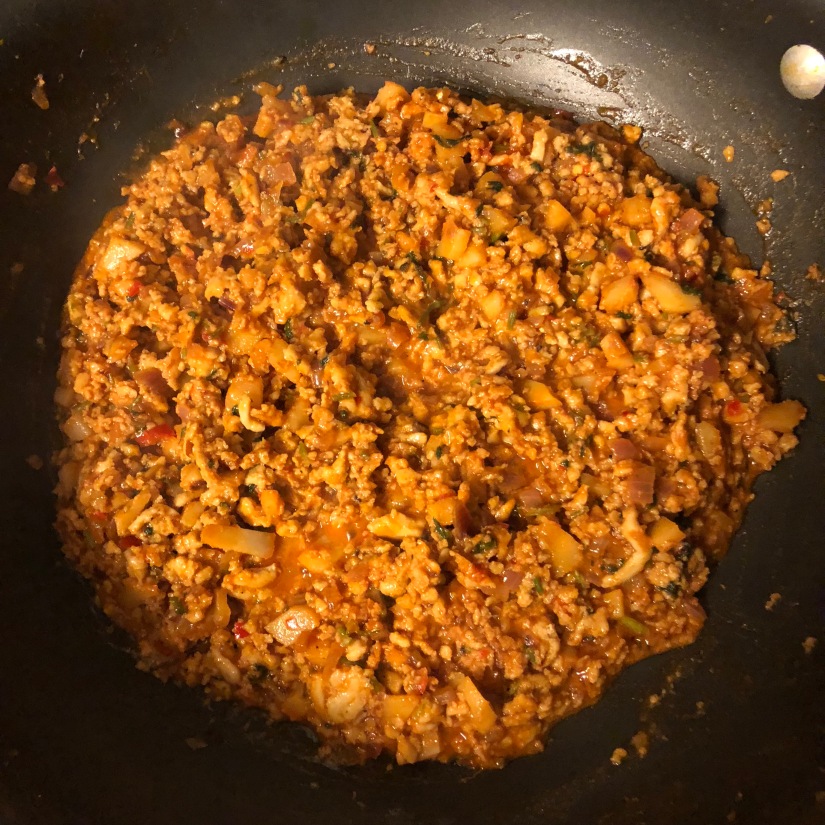
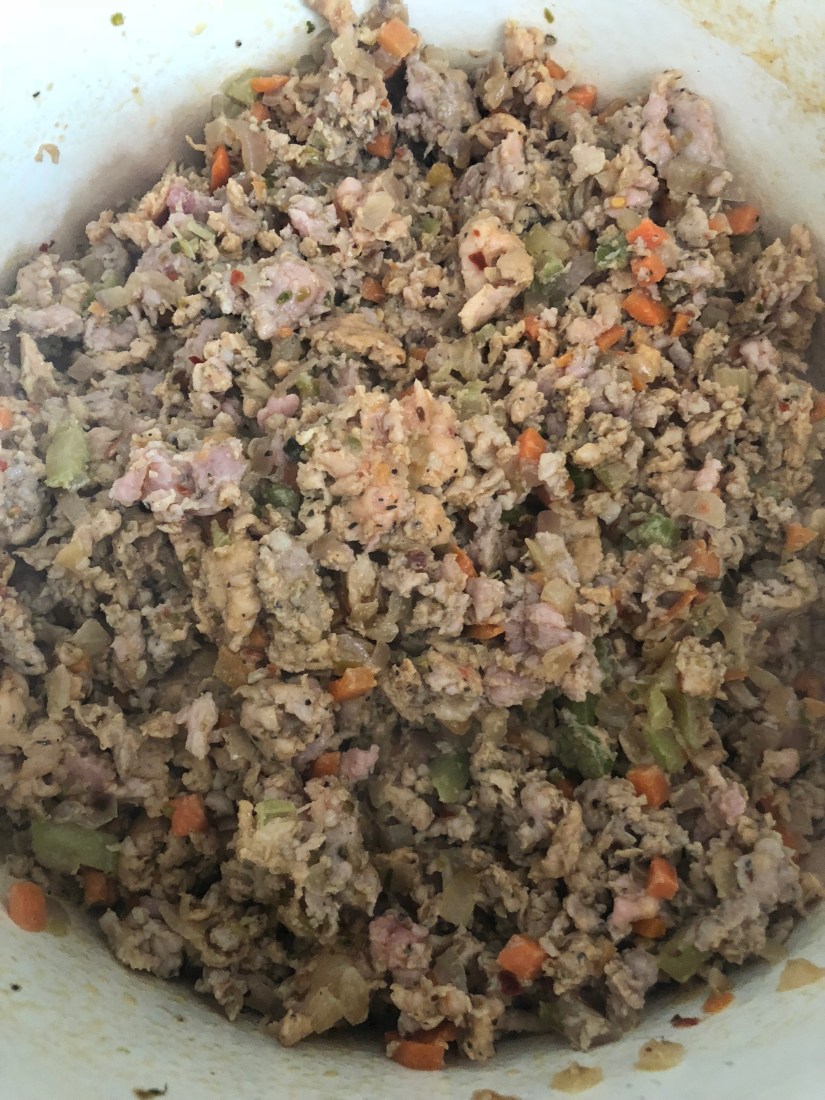
The meat takes a while to cook, but it needs to be moved around enough to make sure it cooks evenly and doesn’t burn. Also, moving it around breaks up the meat. But don’t fret too much about breaking it down into even pieces because we are going to blitz this all up at the end.

L4zgtdmnTI+w0grLBuW8OQ

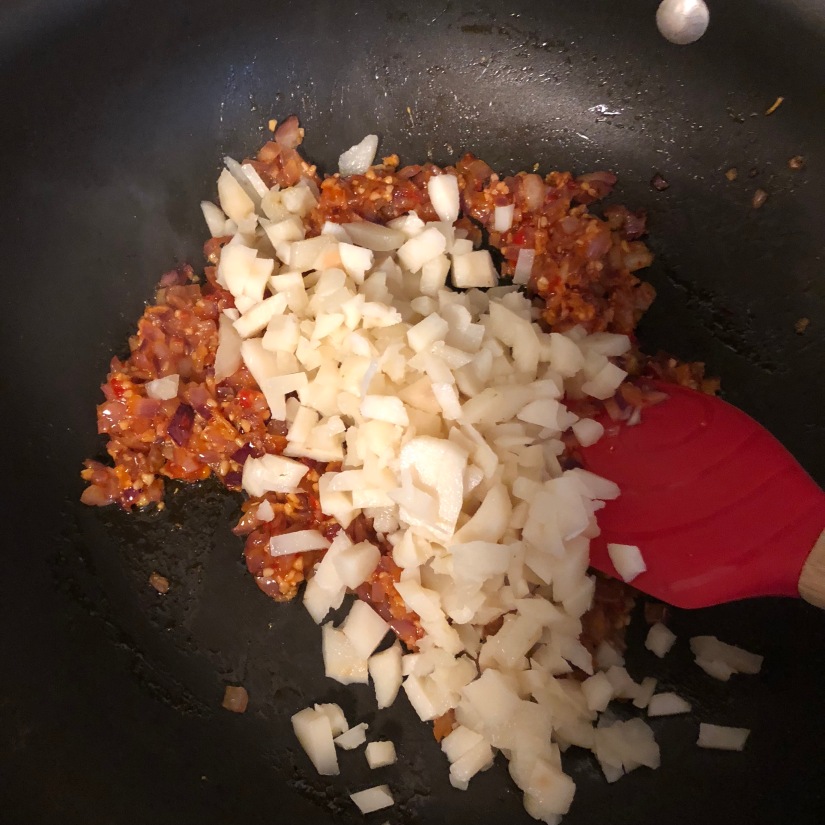
The next essential ingredient to a tomato sauce are the tomatoes! Canned are best. I once chopped about a dozen tomatoes to make a tomato sauce “from scratch” and it was just not nearly the same. The tomato flavor fell flat and was watery no matter how long I cooked it. I never got that rich, robust flavor that I look for when I make this sauce. I try and find canned tomatoes without excess salt because why let someone else season your food?

7EWtQ08wRkCmJPXR+ElGSw

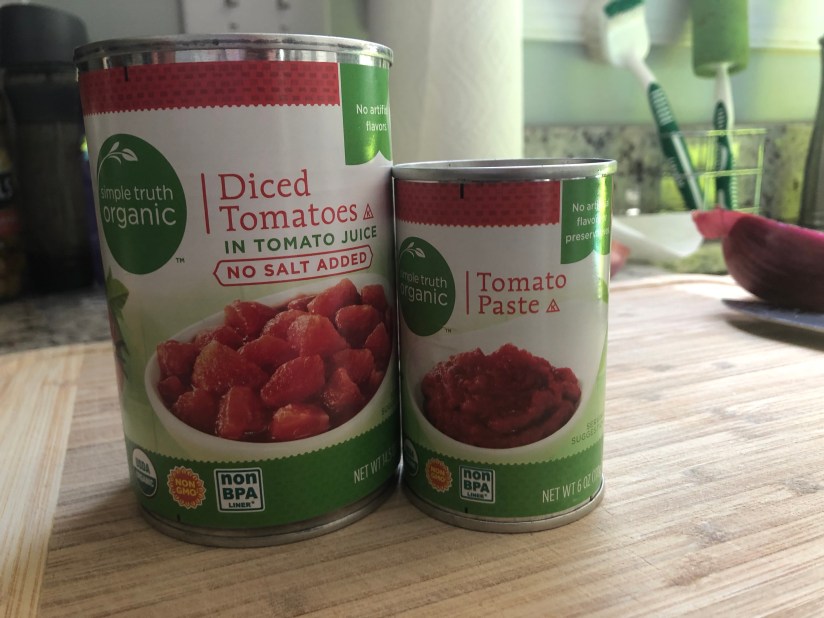
You can add the diced tomatoes into your pan as they come because we are going to be blitzing everything together. Or you can be pedantic like me and blend them up before hand. Either way, into the pan they go.

iwOIUf2tTS+t7NVSR2E2+w

Next comes the tomato paste. I used to be so stingy with my tomato paste. I can’t explain why I was afraid to add tomato flavor to my tomato sauce but I would only add in about a tablespoon and then fret that my sauce wasn’t right. Now I scrape every last bit of paste out of that can and relish in the richness of the flavor at the end.

gQ9sgfC1QTuy%%oHQ6e%vg

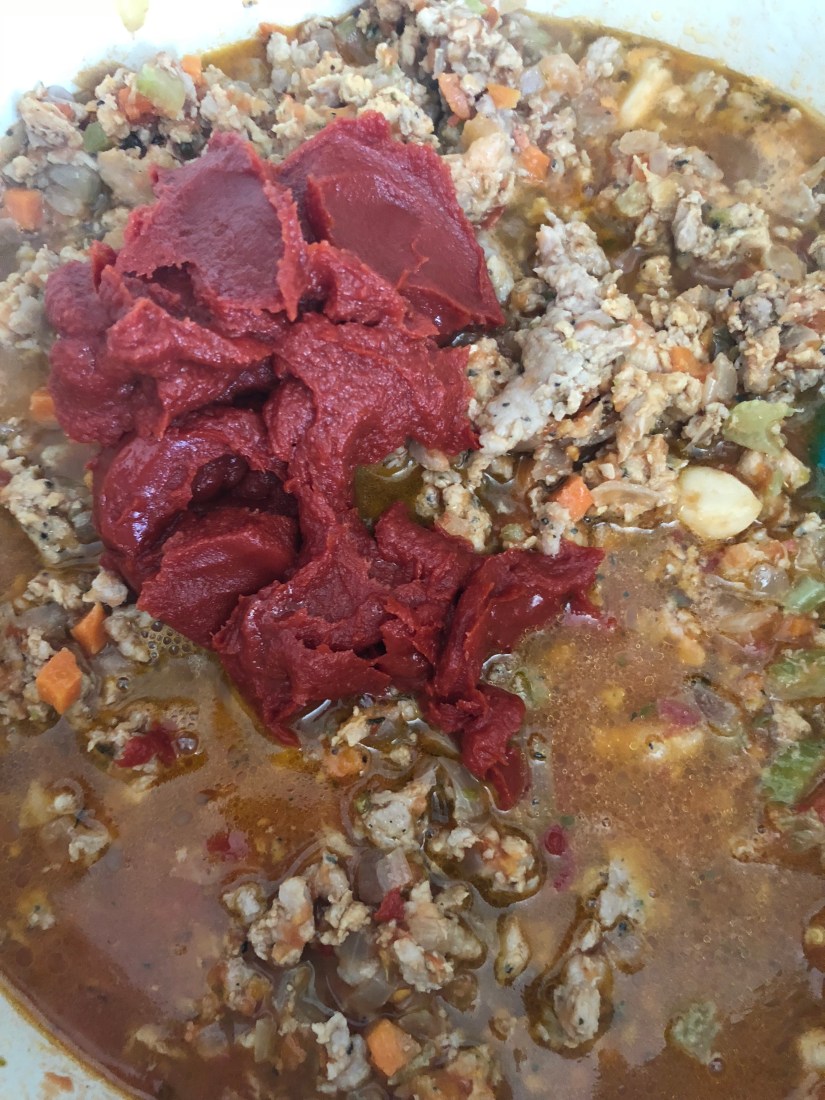
Once you stir the paste in you will see that classic red, richness that one associates with a good tomato sauce. That was another problem with fresh tomatoes, they were never “red” enough.

t6FksRuIT126LgMZqJE1CA

Now for the most important, the most transcendent step… the wine! My rule is that if I won’t drink it I won’t cook with it. Every now and then Lloyd and I don’t finish a bottle of wine and this is usually a good impetus for me to cooking something that calls for wine in the next day or two. Or I open a bottle of what we are going to drink with our meal and use that. Today I had a bottle of Cabernet Sauvignon from the night before and just poured whatever was left into the pan, you usually need about a cup.


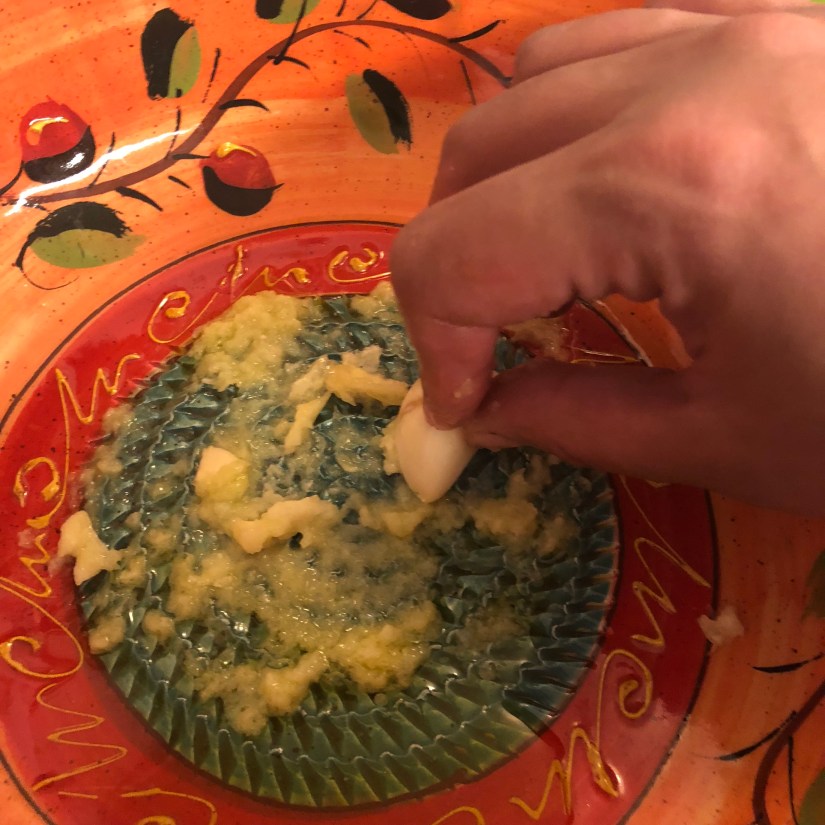
Once I reach this point we are very close to the simmer phase so I add in some whole garlic cloves. I don’t want to add them in too early because overcooking them can cause them to loose a lot of flavor. Today I used roasted garlic cloves because that was what I had and Lloyd loves them. I didn’t worry about dicing these guys up because I knew I was going to blitz later.

Q1NSKnshQJufpslgCsILog

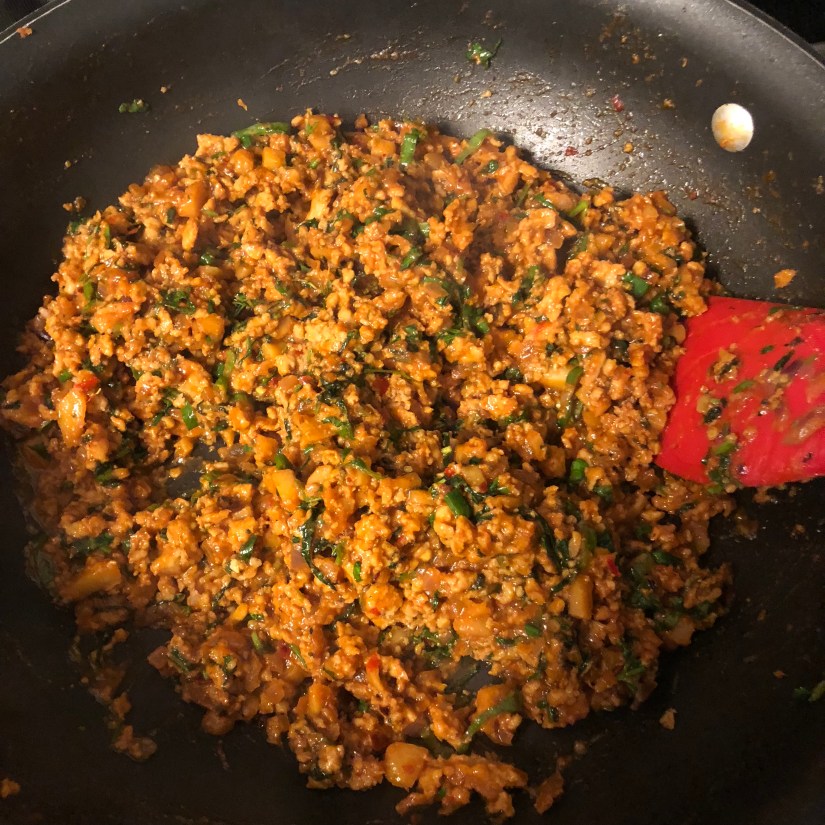
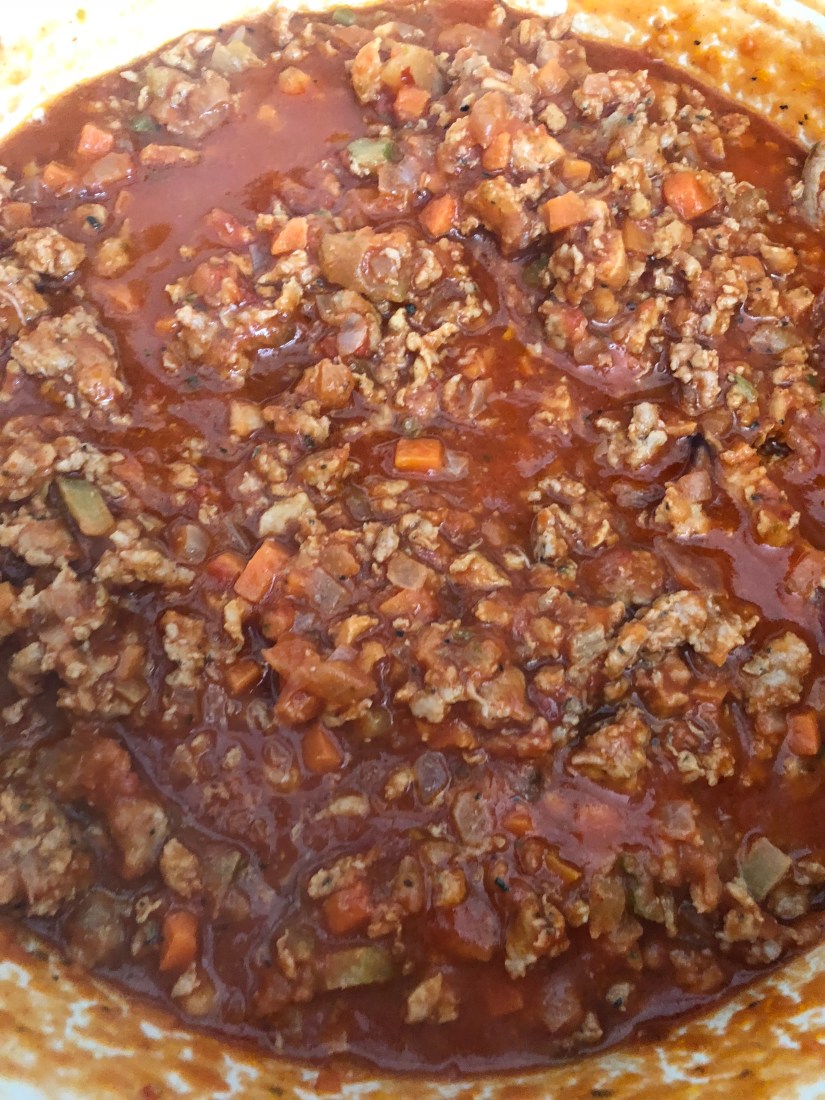
Don’t feel that you have to blend this up. I like a smooth sauce and have an immersion blender which makes it very easy to blend in the pan. I would never even think about transferring this to a stand blender, it would be way too messy. So you do you! Whatever you decide it’s still going to taste great and stick to whatever you decide to smother with this sauce. But here is a side by side look at chunky vs smooth for your edification.


The last and final step it to let is simmer, covered, on low for hours. The longer it simmers the better it tastes. I swing by the pan and give it a good mix about every 45 minutes to an hour. You also want to taste each time. This gives you a good sense of how the flavors are marrying and you can adjust anything if you need to. Sometimes you’ll notice that your sauce has an acidic taste you can’t quite shake. Don’t worry a pat of butter will smooth that right out. Just pop it into your sauce, let it melt and come back in 30 minutes to taste! But there you have it! A simple bolognese that will surely become a kitchen staple.

***I usually make a big pan of this sauce, enough to make at least two lasagnes or casserole. I tend to use half and freeze half***

Ingredients:

  1. 2-3 Tbsp olive oil
  2. 1 large onion
  3. 4 stalk celery
  4. 2 medium carrots
  5. 1 box of unsalted chicken stock
  6. 1-2 pats of butter
  7. 1 Lb chicken sausage
  8. 1 Lb pork sausage
  9. 1 14 oz can diced or crushed tomatoes
  10. 1 6 oz can of tomato paste
  11. 1-1.5 cups red wine
  12. 4-5 roasted or raw garlic cloves (or too taste)
  13. Salt, pepper, garlic powder, crushed red peppers and Italian seasoning to taste (a pinch or two of each every time you add an ingredient is a good rule of thumb)

Recipe:

  1. Dice onions, celery and carrots. 1 part onion to 1 part carrot/celery.
  2. Heat a thick bottomed pan with a good size slug of olive oil and slowly cook your onions with a sprinkling of spices.
  3. Add in your carrots, followed by celery, seasoning as you go. Deglaze as needed with chicken stock.
  4. Add in 1 pat of butter once your vegetables are cooked, reserve the second if needed at the end.
  5. Uncase sausage and add to pan.
  6. Mix thoroughly together, completely incorporating the vegetables.
  7. Once meat is mostly cooked through add in crushed or diced tomatoes, stir to mix.
  8. Add in entire can of tomato paste and stir to mix completely.
  9. Throw in garlic cloves.
  10. Add wine.
  11. Blend using immersion blender.
  12. Let simmer for at least three hours.

Serving:

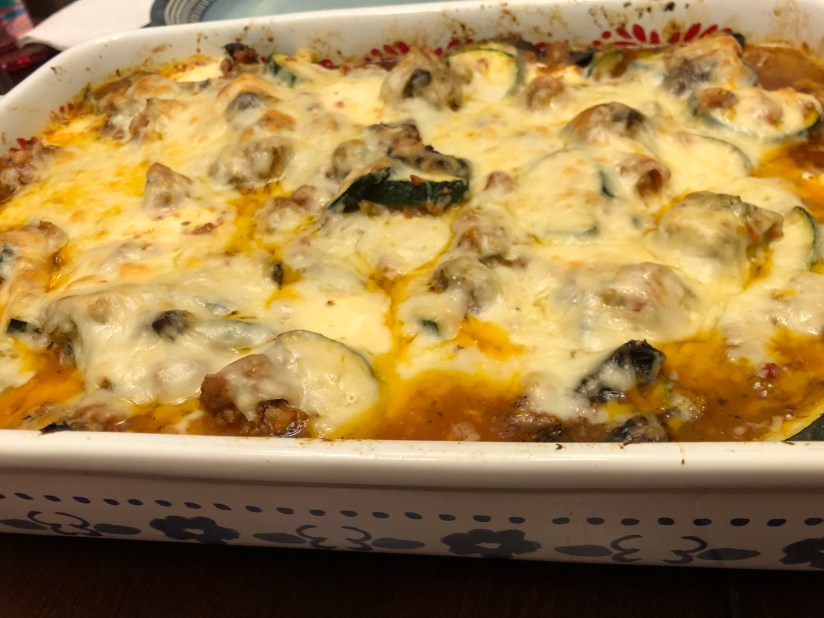
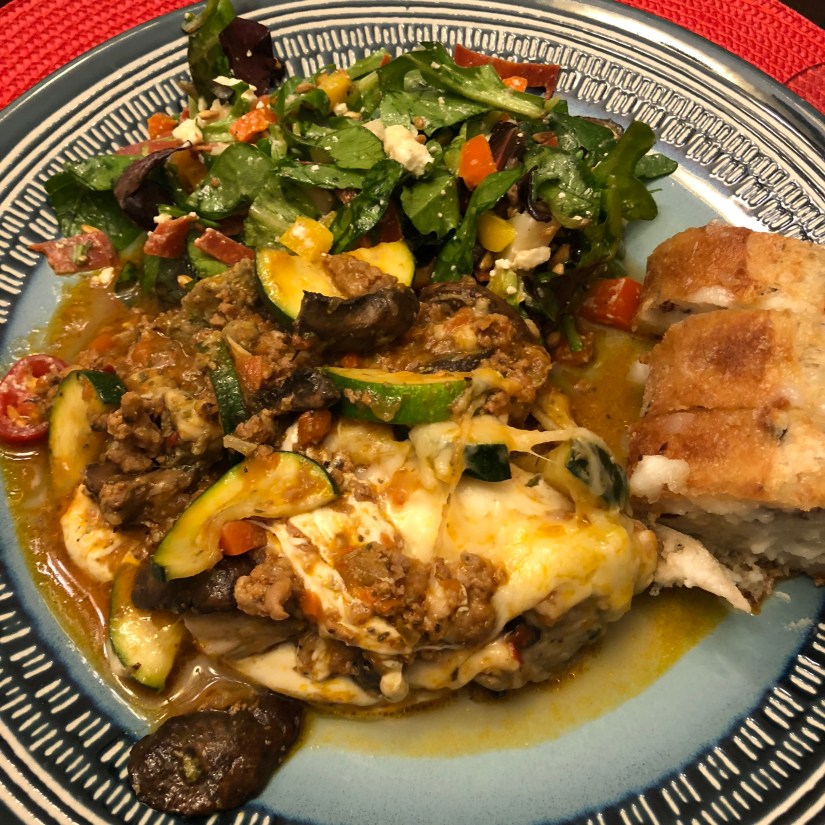
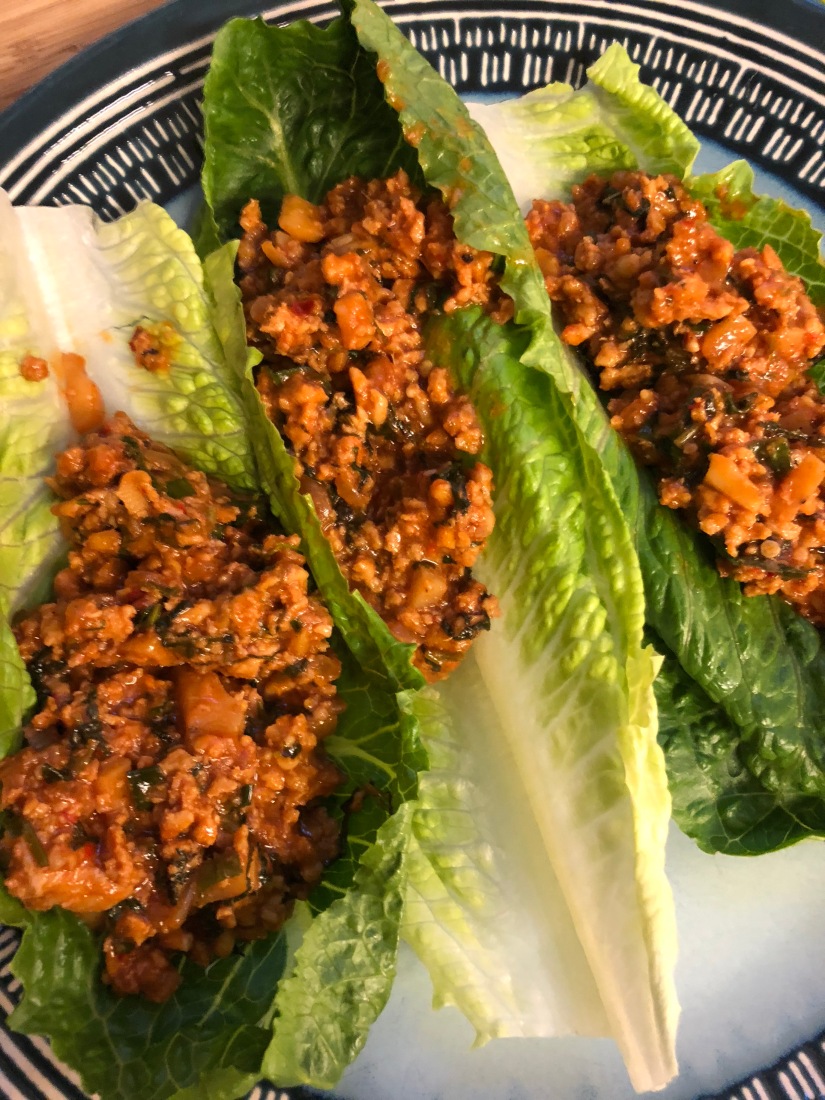
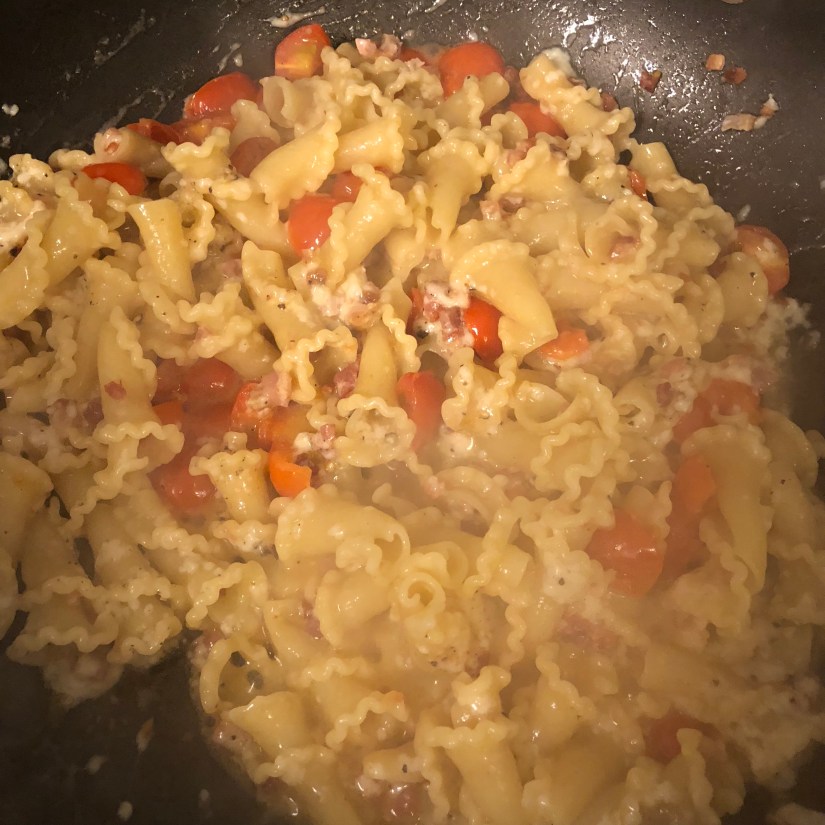
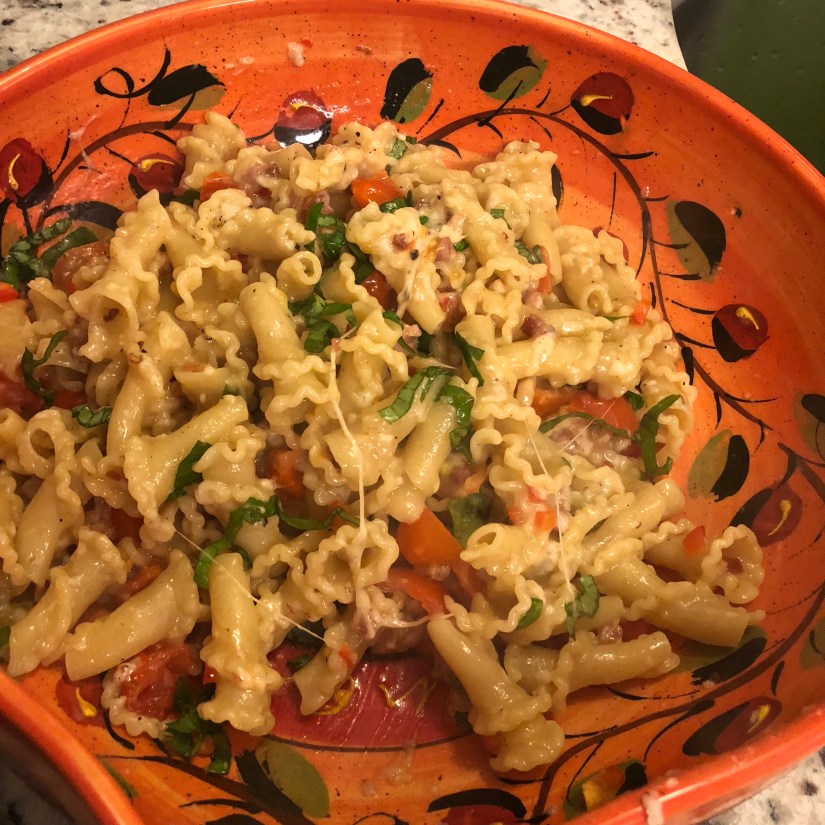
This is a fairly versatile sauce. It works great just on plain pasta with a dusting of cheese. It’s also great for a chicken or eggplant parmesan. But my go to is usually a very hearty lasagne. However, we are going low carb these days so I tried out a Chicken and Vegetable Bolognese Bake instead. It totally satisfied my lasagne craving.

St0AoW4wQMeWFPVTpi6o0g

Food, recipe

Chicken and Vegetable Bolognese Bake

I love Italian food but am trying very hard to stick to a low carb diet. So sometimes these two goals seem at odds with each other. One thing that I make frequently is a Simple Bolognese Sauce. In itself, this is low carb, full of vegetables and basically pretty healthy. So instead of using it to make a lasagne I decide to try something new and used my friends as guinea pigs.

mqcKhhoZS4+Z++5EKveeYA

Zucchini makes a pretty good substitute for pasta and I love mushrooms so I started by slicing up some of each. In order to make sure that they didn’t disintegrate into the sauce while baking I sprinkled everything with salt to draw out the excess moisture.


While I was waiting for these veggies to sweat it out I marinaded some chicken breasts in   pesto. I was out of the homemade stuff so I used this from costco. It is good stuff, I had it in the freezer and pulled it out recently when my homemade batch finally ran out. As you can see, it is Grace approved.


While all of this was resting I served my guests wine, meat and cheese to wet their appetites. I figured if I placated them enough they would like my experiment.

mhOwEOAyRCmBNnW4F9yyhw

Once all of these ingredient were ready to go I mixed them together in a casserole dish with the sauce, added in some fresh mozzarella and covered the whole thing with a shredded Italian cheese blend. A quick bake and dinner was served!

2XvMaJzfQZaWPu6SgUPWdA

You’ll notice a little soupiness along the edges. This sauce was delicious and easily sopped up with some garlic bread. But if you want a drier casserole then simply cook the sauce down a little more before adding it to the pan. Usually when you cook with pasta it soaks up a lot of the moisture so you want a runny sauce. But with chicken and vegetables you are actually going to be releasing more moisture into your pan instead of soaking. I served this casserole with an Italian salad and garlic bread. Feel free to forego the garlic bread for a truly low carb experience.

XYo1ClvUQqmBpO6ofWiCmQ

Ingredients:

  1. 2-3 cups bolognese sauce
  2. 2 zucchinis
  3. 1 package of sliced mushrooms
  4. 1 package of fresh mozzarella
  5. 1 packaged of shredded Italian cheese

Recipe:

  1. Preheat oven to 375 degrees Fahrenheit.
  2. Slice zucchinis into half moons.
  3. Spread out mushrooms and zucchinis on paper towels and sprinkle with salt.
  4. Marinade cubed chicken breasts in pesto sauce.
  5. Let everything sit for at least 20 minutes.
  6. Mix sauce, vegetables, chicken and pieces of fresh mozzarella together in a baking dish.
  7. Cover with Italian cheese blend.
  8. Bake for 30 minutes or until bubbling.
  9. Broil on high for 1-3 minutes to get golden cheese, if needed.
Food, recipe

Thai Larb Gai

Say that three times fast! I dare you! These Thai lettuce cups will have your tongue doing acrobatics of joy. And not just because of the tongue twister of a name. You have probably seen a variation of this in restaurants and on pinterest. It’s an easy and healthy option when you are looking for something to fill you up but not weigh you down. This is by no means an authentic recipe, and has a few Chinese inspiration. I’ll note where I deviate from the norm as we go. Gai means chicken in Thai and ground chicken is at the heart of this dish. But we are going to start with onions!

QHhCLun+RTqd6nZX4Z7DAQ

This is the first place where I start to go off the rails. I like onions and know how essential they are too cooking but big slices of onions don’t appeal to me when I’m eating so I tend to go for a fine chop. And then it’s time to cook these babies!

Moving even further off the rails here, I sautéed my onions in chili sesame oil. I love this stuff. It fills my whole house with the most delicious smells and gives my food a delightfully spicy nutty flavor. Don’t judge me.

FI4%n2Z6SMOy37SJeeCYww

Once your onions are cooked it’s time to add in chilis, ginger and garlic. These things are an absolute staple in any Asian cooking I do. Today I used red chilis because they were the spiciest I could find at Publix.

ma0z2DZQT4uy8LSbQCh4Nw

And one more little variation I used water chestnuts instead of roasted rice powder. First off, I don’t much care for rice (I’m a bad Indian) and for the amount of carbs they pack they have very little nutritional value. Water Chestnuts are only slightly better for you, but I really like them. And they were in my pantry. But if you wanted to go truly low carb you could leave these out with no problem.

8+K3XmFEQZ6ApWym9txPKA

I like to throw my coriander stems into this vegetable sauté before adding my meat because I want them to cook a little but more to release their flavor. But once that’s done it’s finally meat time! Ground chicken is what I used, but ground turkey would work just as well and is often easier to find.

NVjr6XnPT+if4dufF1LICw

I added in some extra salt and pepper when the meat hit the pan. Because I didn’t want my chicken to be unseasoned.

m0gV8u8OQ9mloFIE+enJMg

Once it is cooked through start tasting! You will need to adjust the flavors to your preference. I also add in a little fish sauce while this is simmering. And I use this time to finely chop up my herbs; coriander, mint and basil. Thai basil would have been ideal but I have planted yet!

honpgv5tStCziKPS7GhnaQ

When you are ready to serve take all of those bright green, chopped leaves and toss them in your pan and fold them in! Get a good waft of that steam it’s so herbaceous and lovely!

eGJ42OS4TtCT7GMxLJ1uGw

You don’t want to cook the leaves too much so I usually turn the burner off and remove it from the heat while these incorporate. This is also a good time to taste. You want your meat to be relatively dry as opposed to soupy when you serve so make sure any excess moisture has been cooked off.

wqEGY0tmTraw2cSRPFVIQg

Serve on lettuce leaf boats and enjoy!

h9vjaYkWSmqvfpRu68Ub6w

Ingredients:

  1. 1 Lb. ground chicken
  2. 1 medium red onion finely chopped
  3. 1 Tbsp sesame chili oil
  4. 1/4 cup water chestnuts, diced
  5. 1 Tbsp ground ginger
  6. 1 Tbsp minced garlic
  7. 1 Tbsp finely chopped chillies
  8. 1/4 cup chopped coriander stems
  9. 1/4 cup chopped mint leaves
  10. 1/4 cup chopped Thai basil (Italian will do)
  11. 1/4 cup chopped coriander leaves
  12. Fish sauce to taste
  13. Lettuce
  14. Salt and pepper to taste

Recipe:

  1. Finely chop onion and add to a pan heated with sesame chili oil.
  2. Sautee until just beginning to sweat and add in ginger, garlic and chilis
  3. Cook until fragrant and add in water chestnuts.
  4. Once chestnuts begin to glisten add in your coriander stems.
  5. As soon as stems are fully incorporated add in ground chicken. Salt and pepper as needed thought out all of these steps.
  6. Once chicken is fully cooked add in a few dashes of fish sauce if so inclined.
  7. Mix in chopped mint, basil and coriander leaves. Turn burner off and remove pan from heat.
  8. Serve on a lettuce leaf.
Food, recipe

Mussels and Italian Sausage Fra Diavolo

I love seafood. I love it most when it’s done right and still affordable. And that sometimes means that you are going to get the most bang for your buck if you do it at home. Mussels are one of those seafood treats that only look expansive and fancy. In reality they are one of the cheapest, freshest options in your local seafood case. So skip the shrimp, oyster and lobster and head straight for the mussels. Mussels are endlessly versatile, most often you seem them in a white wine sauce. They can also be done with bacon and smoked gouda which Lloyd lloves!. But today I went with a yummy, spicy, tomato based Fra Diavolo sauce.

dGcocwr4Sb218ev9pYdZ%A

If you haven’t cleaned your own mussels at home and are wary of making yourself sick never fear! I am here for you! Check out my guide on How to Prep Mussels at Home. Once you have your mussels prepped let them sit in a bowl cold of water until you are ready for them. I like to wipe down all my surface after cleaning the mussels before pulling out my meat and veg for the next part of this meal. So having them tucked neatly away works best for me. But I am sure that for the sake of saving time that you could clean these babies while your sausage cooks.

n062dubtghubzrwcbk8a.jpg

I use turkey sausage because it’s healthier, less heavy and easier to cook with since you get to skin the “drain the pan” step. I remove the casings from these pretties and pop them straight into the dutch oven I’ll be serving from.

While these guys are cooking I get a pot of water ready to boil my pasta in. This usually takes about fifteen minutes and by that time the rest of your sauce should be ready so the timing usually works out pretty well. Make sure you liberally salt your water. This is where your pasta is going to get it’s flavor.

Hoej2QcqQo6V4vfJkDV6Kg

While your sausage is cooking and your water is starting to heat chop up some shallots and green onions and add these to the pan with your sausage.

Now it’s time to add in your crushed tomatoes. Only, I didn’t have crushed tomatoes. I thought I did but it turned out to be diced tomatoes. So I poured them into a tall cup and used my immersion blender to make them crushed. I also added in my spices and wine so that it was really easy to add to the pan once I was ready for that step.

Wait for your sauce to naturally thicken as the wine cooks off, stirring occasionally. Once the sauce was ready I dropped my pasta in the boiling water to get the cooking process started but I pulled them out about six minutes early so that the could finish cooking with the mussels in my sausage Fra Diavolo sauce. I used whole wheat pasta because it takes longer to cook, has a richer taste and holds up better when you cook it in a sauce like this.

As soon as the pasta goes in it is finally time to add your mussels! Drain the cold water off and add them to your sauce. Mix everything together and put the lid on. You want a nice tight fitting or heavy lid so that no steam escapes and your mussels get cooked fully.

Leave that lid on for five minutes. Do. Not. Peak. While your mussels are cooking you can do some last minute prep work. Put your bowls in the microwave so that they are nice and warm and grate some fresh garlic and chop up some basil. You want to add these straight into the pan as soon as you pull the lid off and give everything one last good stir so that they cook and release their flavors evenly.

When you pull that lid off and the cloud of steam dissipates you should see the welcome site of all these gorgeous open mussels.

When you serve it I suggest a dusting of shaved parmesan and a sprinkle of chopped basil leaves. It makes things more colorful and that fresh basil taste really offsets the spiciness and richness of the sauce.

IMG_1654

Note on mussels serving size: The bulk of the weight when you buy mussels is the shells. Usually for a main I aim for about a half lb of mussels per person when I’m mixing them into something hearty like this. If I was just doing mussels in a wine sauce with bread or frites I would shoot for closer to a pound a person. But if I was serving them as an appetizer I would only want a quarter pound per person. 

Ingredients:

  1. 1 lb fresh mussels
  2. 1 lb Italian sausage
  3. 1 large shallot chopped
  4. 3-4 scallion bulb ends diced
  5. 1 can crushed tomatoes
  6. 1 cup dry white wine
  7. 1 Tbsp crushed red peppers (or to taste)
  8. 8 oz uncooked whole wheat pasta
  9. Salt and pepper to taste
  10. 3-4 grated garlic cloves
  11. 10-15 chopped basil leaves (reserve some for garnish)
  12. Parmesan cheese for garnish

Recipe:

  1. Clean and prep mussels.
  2. Start well-salted water to boiling.
  3. Remove casings and cook sausage in heavy bottomed pan with a tight or heavy lid.
  4. Chop onions big and add to pot.
  5. Once onions are translucent add in crushed tomatoes, wine, crushed red  peppers, salt and pepper and simmer until wine is cooked off.
  6. Add pasta to boiling water and cook for 6 minutes less than suggested time.
  7. Transfer half cooked pasta and mussels into pot, stir well and cover with lid. Do not touch for 5 minutes.
  8. Grate garlic, shop basil, heat serving bowls.
  9. Open lid and add in garlic and most of the basil leaves, stir well.
  10. Serve in heated bowls with a sprinkling of cheese and reserved chopped basil leaves.
Food, tips and tricks

How to Prep Mussels at Home

Preparing seafood at home can be a little daunting. It can be pricier than land animal meat. It’s often a little trickier to cook. And it also comes with a higher risk for food poisoning. But, the humble mussel is so cheap and oh so easy that it’s a great place to start.

IMG_1502

A couple of simple tips to set you on the right path. Look for mussels between October and March. Look for live mussels being sold on ice. Check the shells, they should be a deep blue, purple or black color and appear shiny. Dull shells might mean dead mussels. Talk with your fish monger and ask about where the mussels came from, how they were transported and how fresh they are. lastly, watch the fish monger, if he isn’t picking through the mussels and discarding dead or unusable mussels than shop elsewhere.

Step 1Buy fresh mussels and cook them within 24 hours.

Step 2Get a bowl full of ice and nestle the plastic bag they came in into the ice and store in your fridge until ready to use.

Step 3Once ready to use remove from fridge and rinse them off in cold water.

dgcocwr4sb218ev9pydza.jpg

Step 4Let them soak in cold water for 20-30 minutes

hquv48NdSHCSbOOCyWAD%Q

Step 5: Remove any unusable mussels. Any mussels that don’t close all the way or that have cracked shells must be thrown out. If you aren’t sure about a mussel tap it sharply on the counter and leave it for a minute. If it doesn’t shut completely than trash it.

g4w5oujrpin50mbwrol9w-e1523660268267.jpg

Step 6Remove the beard. Stroke the side of the mussel until a small, hairy tuft is found and then pull down sharply towards the hinge. Not all your mussels will have a beard but you want to get rid of the ones that do have them.

fpoq4kjktgmscumbaiya.jpg

Step 7: Use in your favorite recipe. Any mussels that don’t open when you cook them should be discarded.

I really hope this helped! If you are looking for a good recipe might I suggest my Mussels and Italian Sausage Fra Diavolo.

IMG_1654

Food, recipe

Meatloaf Stuffed Mushroom “Sliders” with Shoestring Beet and Squash “Fries”

Lloyd and I were at a restaurant called Matchbox with a group of friends and being the health conscious 30 somethings that we are we all ordered low carb, gluten free, vegetarian options. But at the table next to us came out a platter of sliders piled a mile high with shoestring fries. I have been wanting something like that ever since I saw them. So I created these mushroom and chicken meatloaf to replicate the sliders and baked spiralized beets and butternut squash into a semblance of shoestring fries. I have to say it really did hit the spot and I didn’t feel nearly as guilty as I would have had I eaten the sliders and fries at Matchbox.

TEHToA8MTySzgz%LjEdF0A

To start I prepped my spiralized beets and butternut squash. Claire gave me a veggeti last year for my birthday and it is a stellar addition to my kitchen. I had spiralized the squash and beets earlier in the week and failed to get a picture. But here is what happens when the vegetti takes on a zucchini.

IMG_7012.JPG

But back to my butternut squash and beets! The first thing I had to do was get the excess moisture off of them so that they would crisp up in the oven. I spread them out on some paper towels and sprinkled them with salt. I love how pretty and colorful they were.

zYdS++VISCS2IsuecbH9mQ

Next I need to ready my mushrooms. Kroger has bins of mushrooms where you can pick out the ones that you want. I tried to find ones that were evenly sized and would be easy to stuff. I de-stemmed them and diced the stems up into small chunks to use later.

The last real prepping step was getting the meatloaf mix together. I cheated a bit and started off with some chicken Italian sausage. I removed the casings and then added in my own seasonings to amp up the tastiness of this!

4kKKoj8qRAiiItdbky5hEQ

I felt that should I mix in things to amp up the Italian seasonings already present in the sausage. So I chopped up some basil, scallions and sun-dried tomatoes as well as some garlic. I added in some shredded mozzarella and about half of those mushroom stems. I used an egg as a binder but no bread crumbs because of the low carb effort. I didn’t add in any extra salt, pepper or other spices because I’ve had these sausages before and they are pretty well balanced. But if you are using plain ground turkey then you would definitely need some.

I stuffed all the mushrooms with a heaping spoonful of the mix trying to spread it out evenly and then turned my attention back to the beets and squash. I wanted to wring the excess water out of the veggies so I placed another paper towel on top of them and tightly rolled them up. Then I spread them on a baking sheet and popped them in the oven before my stuffed mushrooms.

Everything came out of the oven and I plated them with “fries” piled on top of my “sliders.” It was definitely more colorful than the restaurant version. And I have to believe it’s a lot healthier. It also really satisfied my burger and fries craving which was the goal all along!

NhapdmPsQ5OVOeetI8bvPw

Ingredients:

  1. 12 mushroom caps
  2. 1 package of Italian chicken sausage
  3. 1 egg
  4. 1 heaping Tbsp minced garlic
  5. 4 oz chopped sun-dried tomatoes
  6. 1/4 cup chopped basil leaves
  7. 1/4 cup sliced scallions
  8. 1/4 cup shredded mozzarella
  9. Salt, pepper and other seasonings to taste
  10. 1/2 cup spiralized beets
  11. 1/2 cup spiralized butternut squash

Recipe:

  1. Preheat oven to 350 degrees Fahrenheit.
  2. Spread out squash and beets on paper towels or cheese cloth and sprinkle liberally with salt.
  3. Wipe mushrooms clean and pull stems off. Chop stems and set aside.
  4. Place mushrooms on a baking tray.
  5. Mix together meat, egg, garlic, sun-dried tomatoes, basil, scallions, cheese and seasonings.
  6. Scoop meat mixture into mushroom caps.
  7. Wring out squash and beets and pat dry.
  8. Place squash and beets on baking tray and place in oven on top rack for ten to fifteen minutes.
  9. Move veggies down to lower rack and stir gently to avoid breaking up strings.
  10. Place mushrooms in oven on top rack and cook everything for an additional 30-40 minutes.
  11. Plate with shoestring squash and beets piled on top of your meatloaf stuffed mushrooms.
Food, recipe

Caprese Chicken Bake

It’s almost spring here. Almost. And Spring means basil. Basil means pesto. So. Much. Pesto. But it’s not quite spring and I don’t have enough fresh basil at the moment so I had to settle for the store bought variety. I had a pile of frozen, pesto marinaded chicken breasts in the freezer which I used to make this low carb dinner.

8m1iwr95qaivkrb1kc7kw.jpg

I spread them out on a baking sheet and covered them in the ready made pesto. I also realized that sizing wise I had some that were way too big so I cut them down so that everything was more similar size-wise. And then covered with fresh mozzarella.

50u8ilsdsmqqjgil9g5zkq.jpg

I added in some tomatoes both for color and because the fresh tomato taste is integral to a good caprese balance. I also sprinkled on some fresh ground pepper. Anyone form the south will tell you that ripe tomatoes just require fresh ground pepper.

3kTrdKH4RQWyOt+dtNlszA

Now it was time to bake. Once it came out of the oven Lloyd quipped that I had a cooking fail because it didn’t look particular appetizing. Little did the man know that I had a plan. But it definitely looked unappealing.

YHL1Jv+sRSm5MQQJSh+z+g

However, once I scooped the breasts out of the pan and plated them with a balsamic dressed greens salad (completing the caprese balance) it no longer looked like a cooking fail.

Wcy9NK93QTyxBow7SQpmGA

Hope you enjoy making this! It’s easy, fast and rather healthy if you are looking for low carb options. You can make this recipe with as many or as few chicken breasts as you want. You don’t have to use marinaded chicken if you don’t have it. I just happened to have some in my freezer and decided to use those. Also, if you have leftovers just stick them in the fridge and use them for brunch the next morning with this, Chicken Caprese Brunch.

Ingredients:

  1. Pesto
  2. Chicken breasts and/or thighs
  3. Mozzarella (fresh or shredded)
  4. Tomatoes
  5. Pepper
  6. Salad greens
  7. Balsamic dressing

Recipe:

  1. Preheat oven to 375 degrees fahrenheit.
  2. Cut chicken pieces to approximately the same size and cover with pesto.
  3. Top chicken pieces with mozzarella followed by tomatoes and sprinkle on some pepper.
  4. Bake chicken for 30-40 minutes until cheese is starting get golden and bubbly. Liquid will release. Do not be alarmed.
  5. Serve with greens lightly tossed in balsamic dressing.


Food, recipe

Asian Five Spice

Sometimes I get really annoyed by how expensive spice mixes can be. They are definitely convenient but marked up. So I’ve gotten into the habit of making my own for some of the easier ones. A very easy one to start with is Asian Five Spice. Easy because the clue is in the name. It only has five ingredients.

fullsizeoutput_5a10

Another nice thing about making your own spice mix is that you can get the balance you like. We prefer spicy food so I use an equal ratio of szechwan peppercorns in my mix. Although a lot of places will recommend less peppercorns. Use what makes your taste buds happy.

RrSp4f6gQxuaCYBOLxu5LA

I have a coffee grinder that I reserve just for blitzing my spice mixes. I did the cinnamon and whole star anise first because they are the biggest, and hardest to crush up. Then added in the rest. It’s a lot easier to get all of your spice powder out with a small brush so if you are heading down the make your own spice blend road I suggest getting one.


Storing is easy. Use any airtight container you have at hand, this could mean a mason jar or rubber maid container, or even a zip-lock bag. I used up the last of my star anise for this so I didn’t make a very large batch. If you don’t have whole star anise feel free to substitute in the seeds (as I clearly did). Use about a 1/4 tea spoon for every pod you are replacing. But as long as you have the proportions right you can make as much or as little as you want.

5ht0ZsrGR62pbfuA2LDECg

Ingredients:

  1. 1 stick cinnamon
  2. 3-4 star anise pods
  3. 1/2 tsp of cloves
  4. 1 tsp of szechwan peppercorns
  5. 1 tsp of fennel seeds

Recipe:

  1. Blend all ingredients into a fine powder in a coffee grinder or blender.
  2. Store in an airtight container. Lasts for up to a year.
  3. Use in any asian inspired dish, best with Chinese cuisine.
Food, recipe

Turkey Salad Wrap

I had to make a quick lunch the other day and luckily I had a small turkey breast in the fridge which I decided to dice up and make into a salad. This time of year it’s easy to find these hunks of ham and turkey. I suggest grabbing them and freezing them for use later on in the year.

Kr7f1vHDT66jrWaSz9qzVQ

Cube the meat and add in some mayo. I know that in some places salad doesn’t mayo. Those places aren’t the south. That being said you don’t need a ton of mayo, just enough to light coat the meat.

ugOShiTTTdOpqEt+2PkzvA

Next it’s time to add any mix-ins you want. I used a trip of bell peppers, some chopped chives and parsley, a little stone ground mustard (Lloyd’s favorite), and pepper. I don’t typically add extra salt as deli meat is usually salted well enough.

CRR8KkrASSiSwfq803onzQ

Give it a good mix until everything is well coated. See, you don’t need a ton of mayo.

IW0NFoGhTiiDEmOhOh1UWA

Next it’s time to assemble. A little lettuce, a little shredded cheese and you are ready to go!

Roll it up and serve! Any extra salad can be kept in the fridge for about 3-4 days. You could also make these ahead of time and eat them for a few days. If you spread the salad greens evenly across the wrap it will stop them from going soggy from the mayo.

7EV%NFKHT4Okzadsp4MVkg

Ingredients:

  1. 1 small package of spiral cut ham or deli trukey
  2. 3 small bell peppers (red, yellow and orange) or one large one
  3. 1 Tbsp chives
  4. 1 Tbsp parsley
  5. 1 Tbsp stone ground mustard
  6. Pepper to taste
  7. Wraps
  8. Salad greens
  9. Shredded cheese

Recipe:

  1. Cube your meat
  2. Add in your mayo, bell peppers, chives, parsley, mustard, pepper
  3. Stir well to coat everything evenly
  4. Place salad greens, cheese and turkey salad on wrap and roll up
Food, recipe

Garlic and Pancetta Pasta

Recently I went to the Virginia Wine Expo and while slightly tipsy I bought an I See Spain grater bowl. It is an absolute dream and I made this pasta to showcase it’s greatness!

S+29Mbt3TQS2OUw5XQt8DA

Those raised ridges on the bottom are very sharp and actually grate garlic and other roots, hard cheese and chocolate in seconds. With this dish I used garlic. Add in a little olive oil to the bottom of your dish to help with grating.

mMR6zR3MTz+JMOzG5uy86w

The two cloves only took me a few minutes. In fact the pancetta that I had in the pan had barely started cooking before I was done. Which brings me to the pancetta step. You want this to cook up nice and crispy so do it at a low heat stirring frequently so that nothing burns.

h2Xns2v7QEyMpwQ2zuTuMA

Cook your pasta in boiling water while the pancetta is cooking. The pasta I used called for boiling for about 5-7 minutes but because I was going to finish it off in the pan I only boiled it for about four minutes. And then added it when the pancetta looked like this.

H3eW%QDnRK2LSUQl9R5C5w

Next I added in the pasta and some diced cherry tomatoes.

I3ePSwqbSzyo2JXzcRvBlA

And some parmesan cheese. Because cheese is life.

nsEMhx00S4WByLFIhJVHZw

A healthy splash of your pasta water deglazes the pan and finishes cooking this pasta.

%9j1rxk5Sd2cDiKYRiD+yg

Once the excess moisture as cooked off transfer it into the grater bowl and stir around so that the garlic and oil coats everything.

FHynm4+eRiqTBooQ16SaFA

I also sprinkled in some fresh chopped basil  for color and flavor.

Ingredients (feeds 4)

  1. 1 package of pancetta
  2. 2-3 cloves of garlic
  3. Olive oil
  4. 1 cup chopped cherry tomatoes
  5. 2 cups uncooked pasta
  6. 5-6 chopped basil leaves

Recipe:

  1. Grate garlic and add to olive oil at bottom of serving bowl. Or use an I See Spain grater bowl if you have one.
  2. Boil pasta per the directions on the packet. Shave of 2-3 minutes so that you can finish cooking it your pancetta.
  3. Add pancetta to a warm pan and cook on low heat until crispy and cooked through.
  4. Add your pasta into the pancetta pan.
  5. Toss in cherry tomatoes and parmesan.
  6. Use about a half cup of the pasta water to deglaze and finish cooking your pasta
  7. Transfer into serving and bowl and toss well to coat with garlic and olive oil.
  8. Sprinkle on some chopped basil.