Food, recipe

Gingery Egg Drop Soup

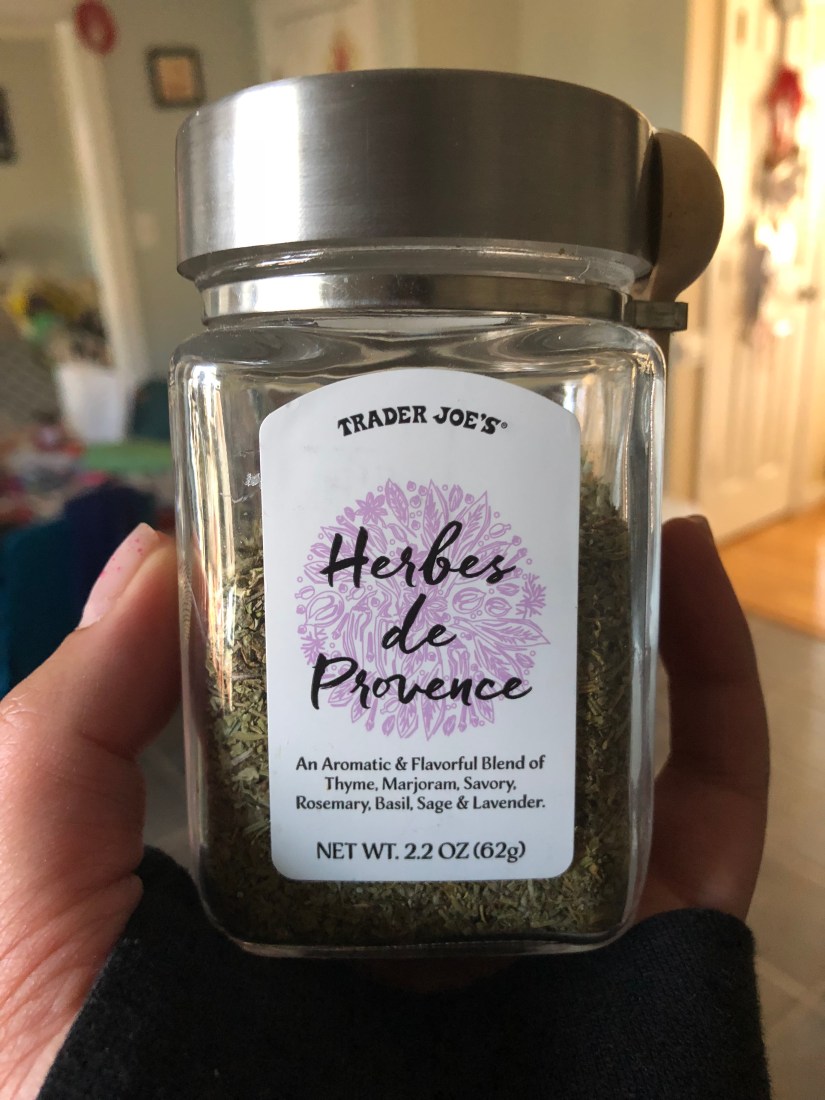
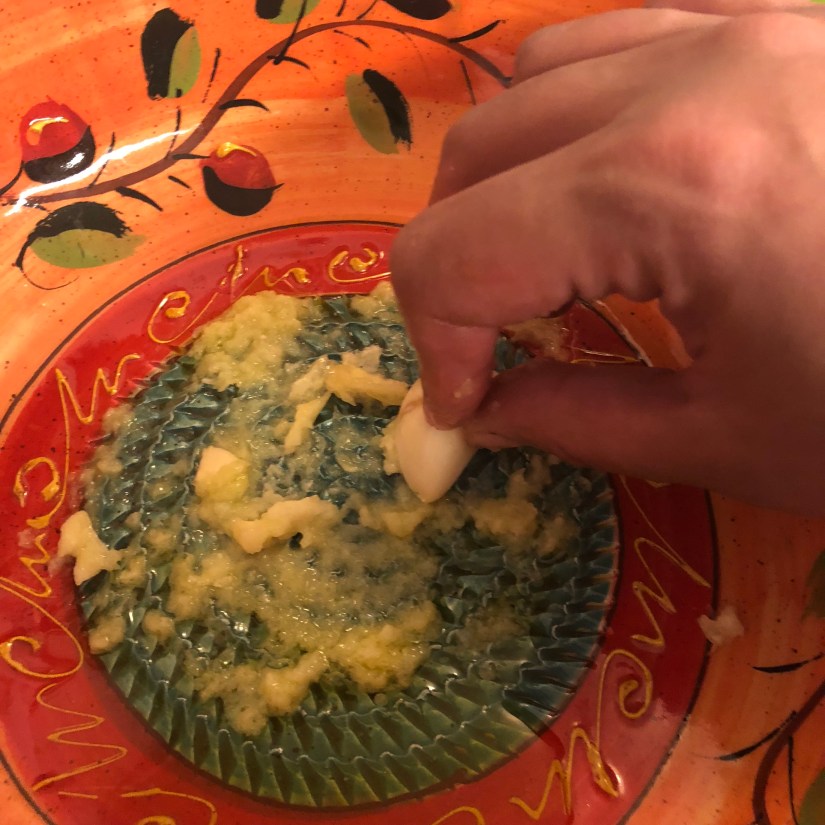
Whenever I’m a bit under the weather nothing makes me feel better than egg drop soup with extra ginger. The spiciness of the ginger really opens up my sinuses and settles my tummy. Plus I just love the flavor combos with the silky cooked egg and warmly seasoned chicken. Anyway, onto the cooking! I usually start by grating up my ginger. This used to be a really onerous task that put me off making this soup. But ever since I got my I See Spain grater bowl and plate I have been itching to make this soup.

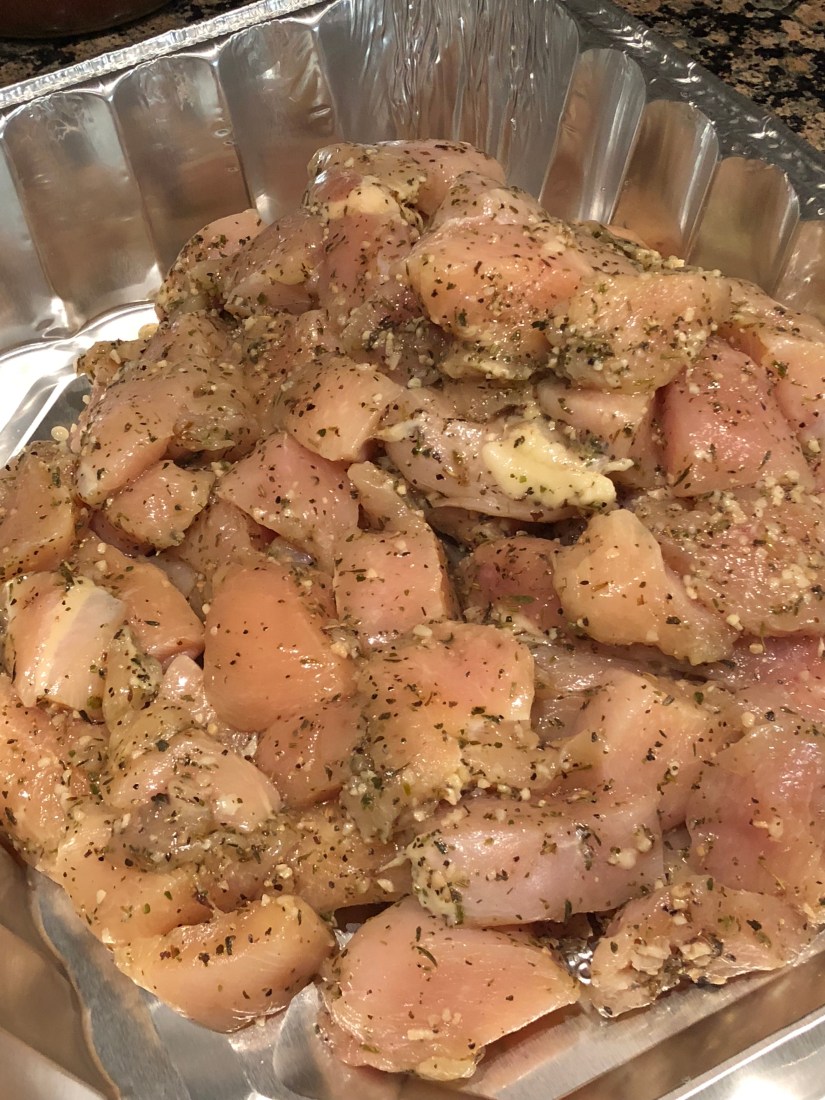
I grated down a whole knob of garlic in next to no time. When I’ve used graters or my microplane in the past I feel like it takes forever to make even a little dent in your ginger.  And I hate getting out the blender to blitz up a knob of ginger because it clutters up my limited counter space and adds a bulky item to my sink. Anyway, now it’s time to season my chicken. I do this first so that it has some time to marinade while the veggies cook. You could cube up your meat but I prefer the thin slice method. Go against the grain with a very sharp knife and you will get through all your breasts (or things if you desire) very quickly.

jav7LzONTxaLhu5xr2%Ctw

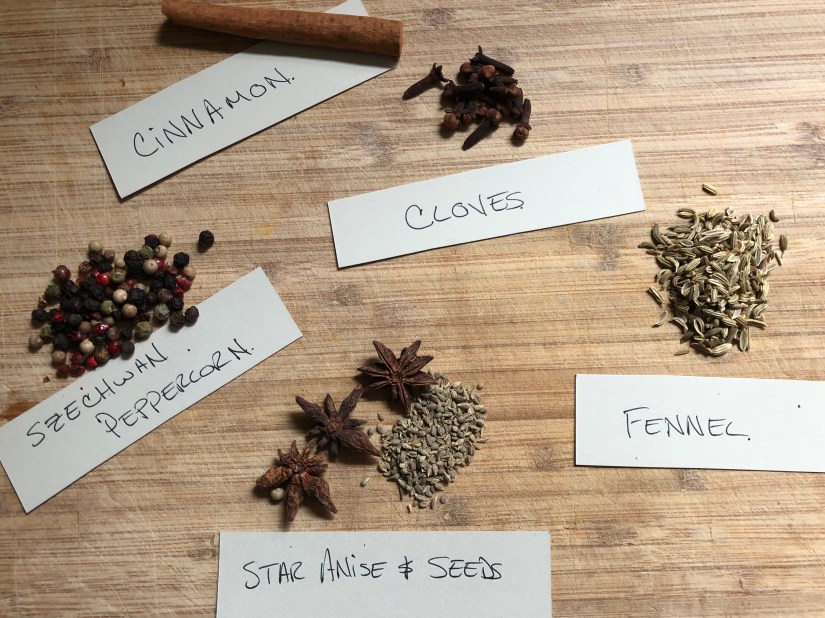
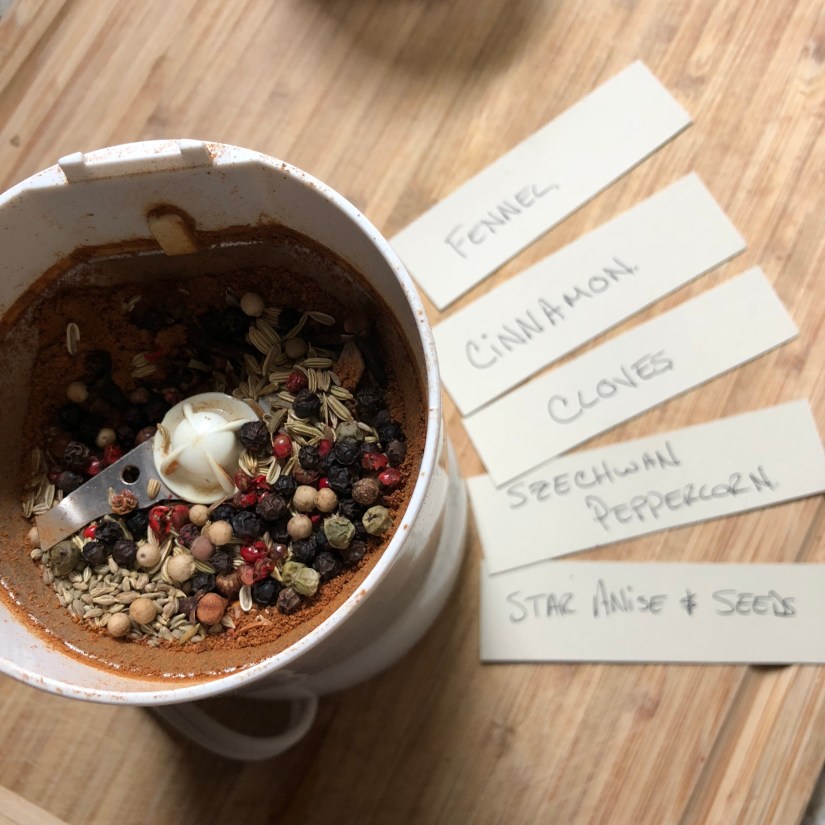
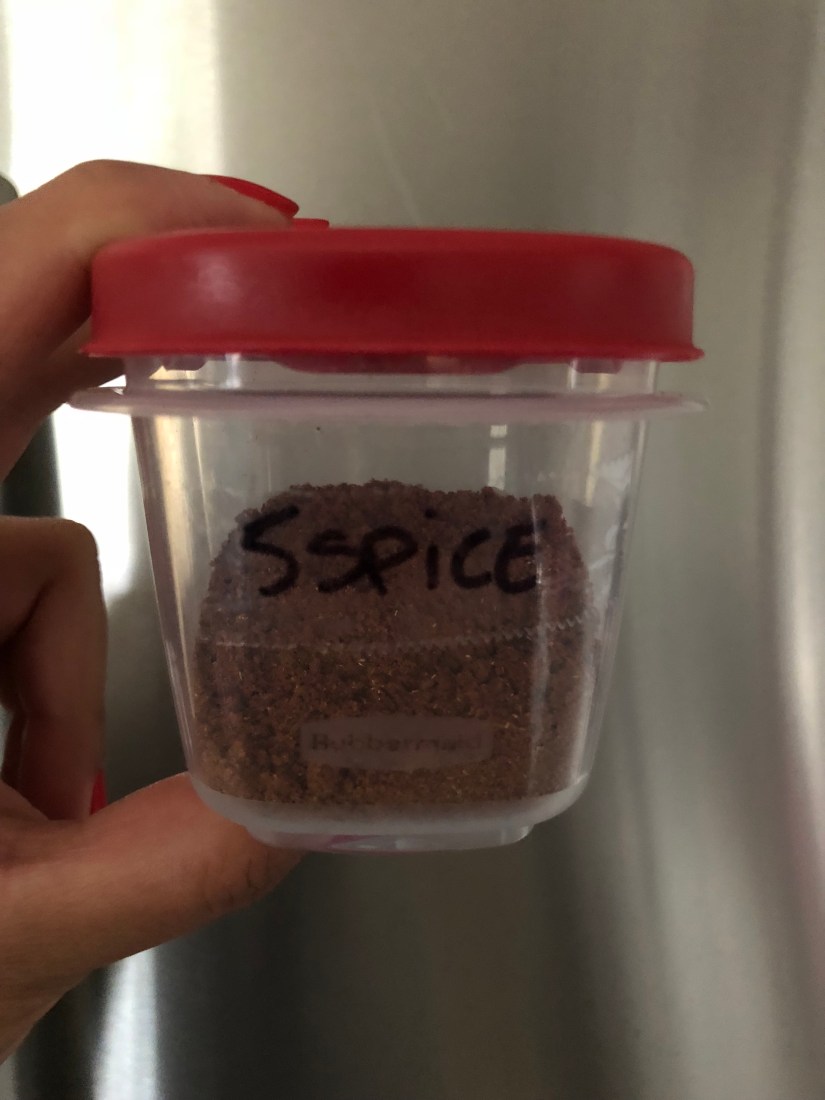
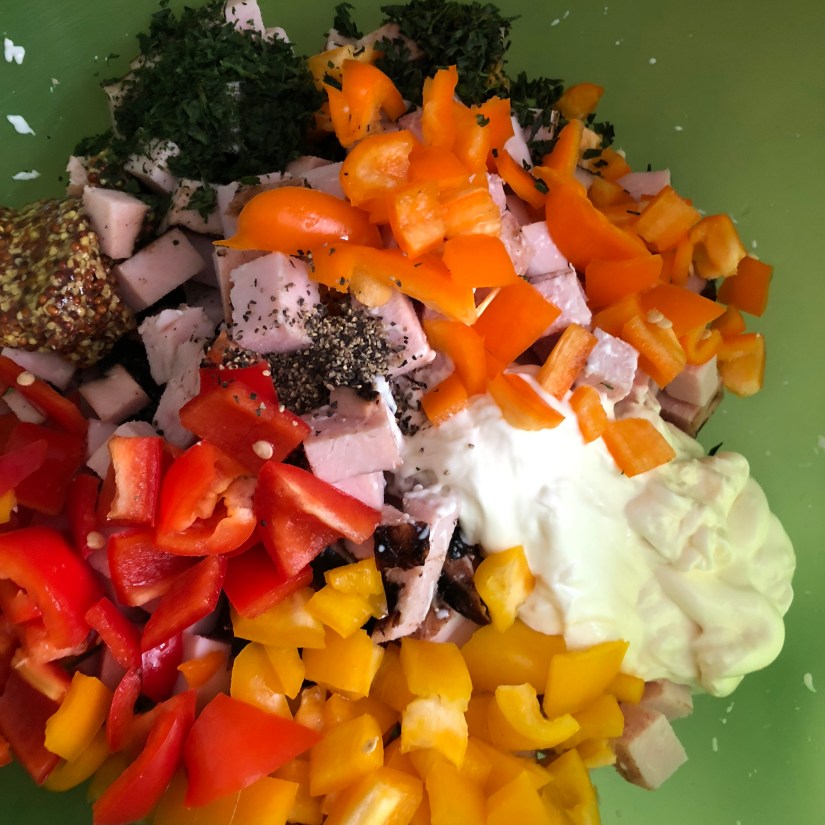
Now it’s time to marinade! I use the ginger I ground in the beginning as well as garlic I ground up in the same dish. And then my dry spices; salt, pepper, crushed red peppers and asian five spice. And then a couples of splashes of soy sauce and rice wine vinegar.

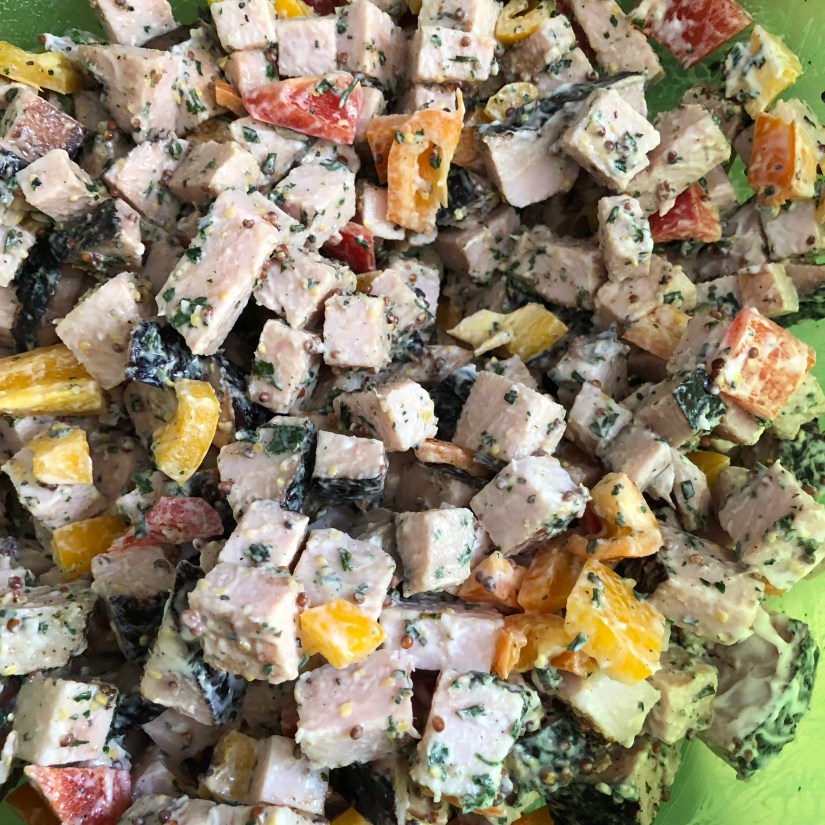
Once you have everything added to your chicken you want to give it a very good mix and let it rest while you go on to the next step.

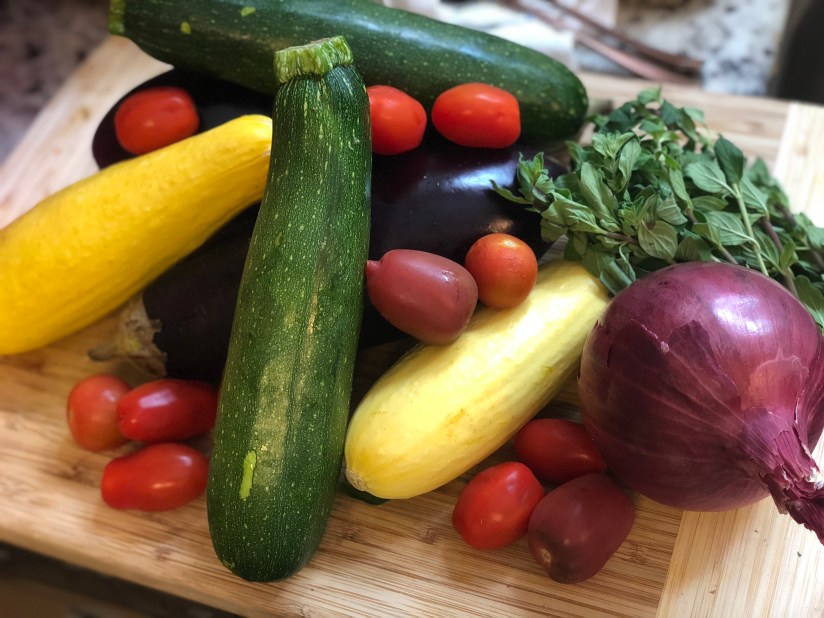
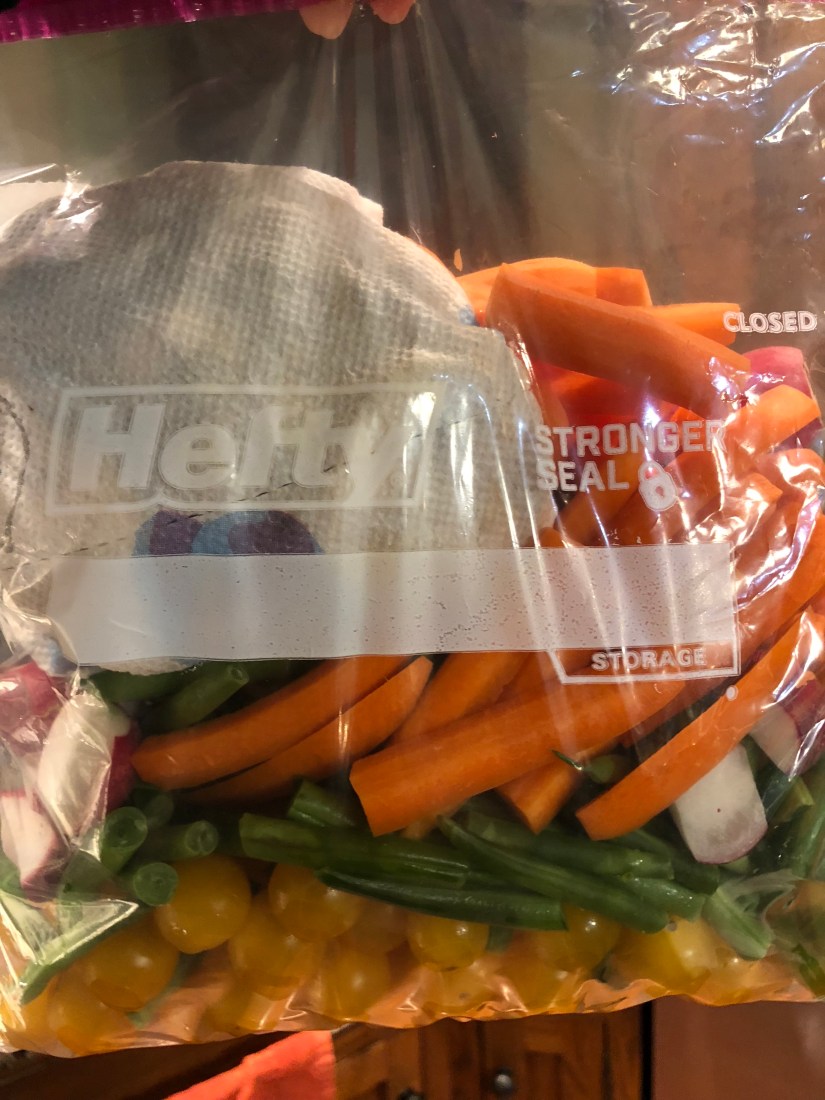
Once you have your chicken marinading it’s time to get your soup pan heating. I use a dutch oven because I like the nice consistent heat it gives. I have dreams to one day own a Le Creuset dutch oven, but for now my target one serves me very well. But, I digress. Onto the obligatory vegetable photo shoot!

a5dXky97T8WfAuwhg8RS2AOJEf4hLaTcOJylC1uzaLjQ

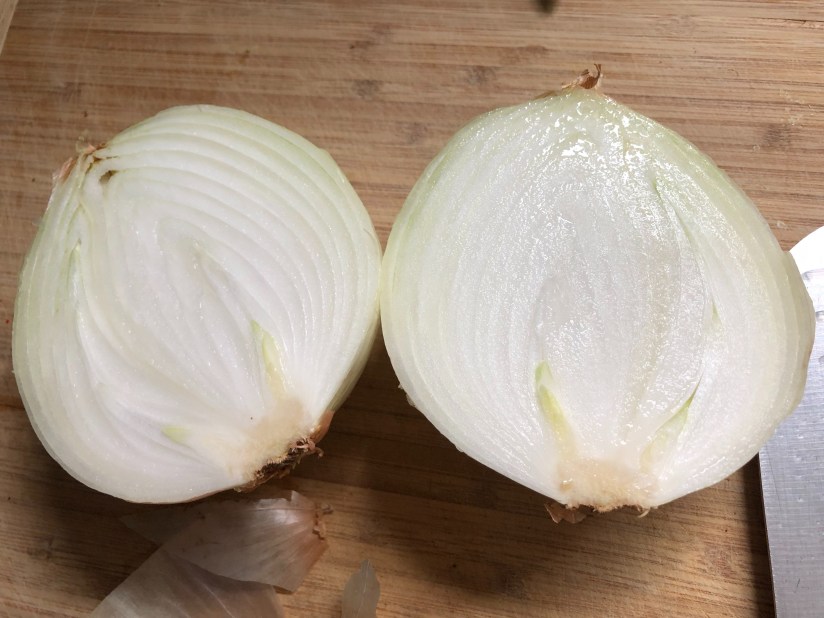
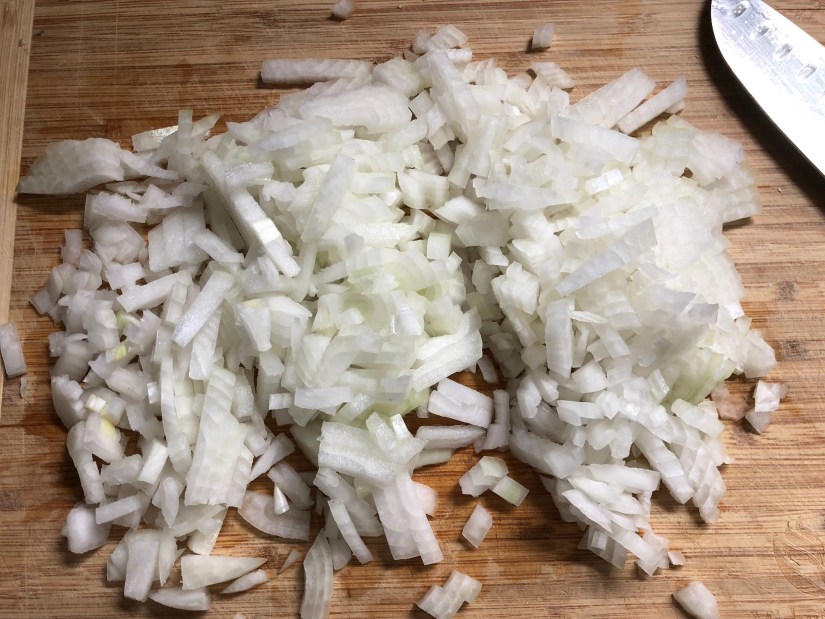
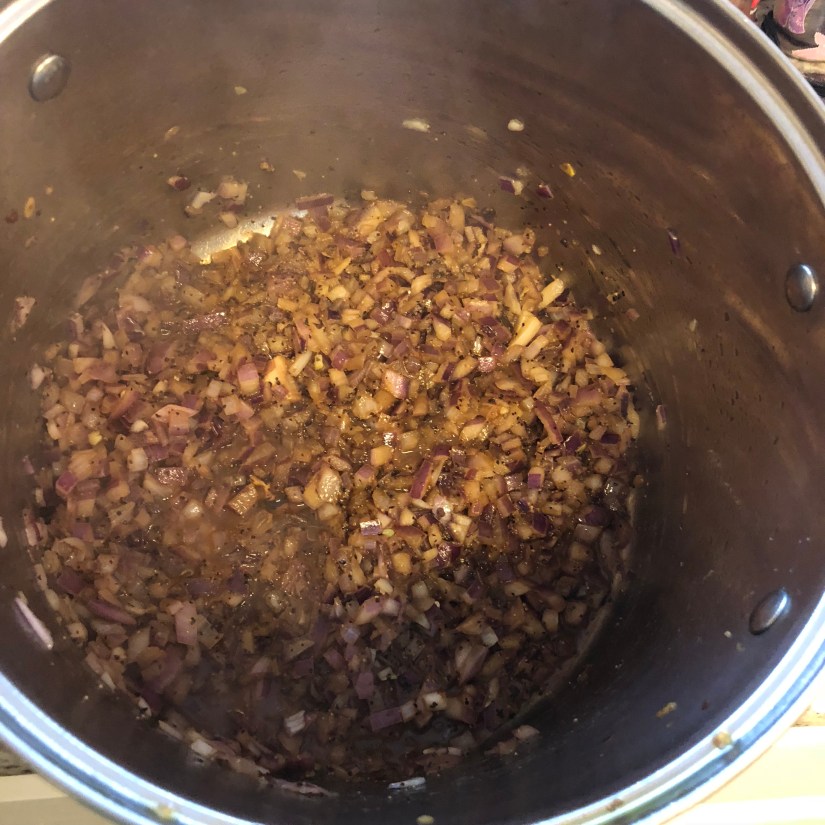
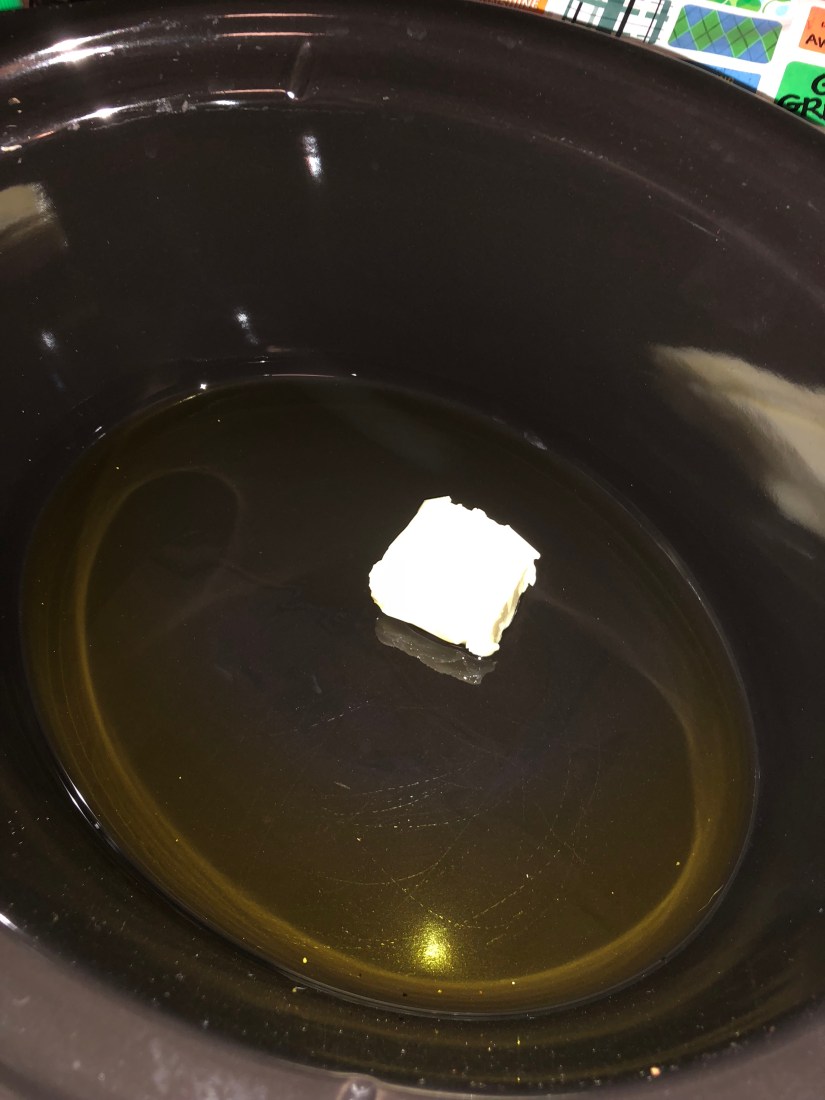
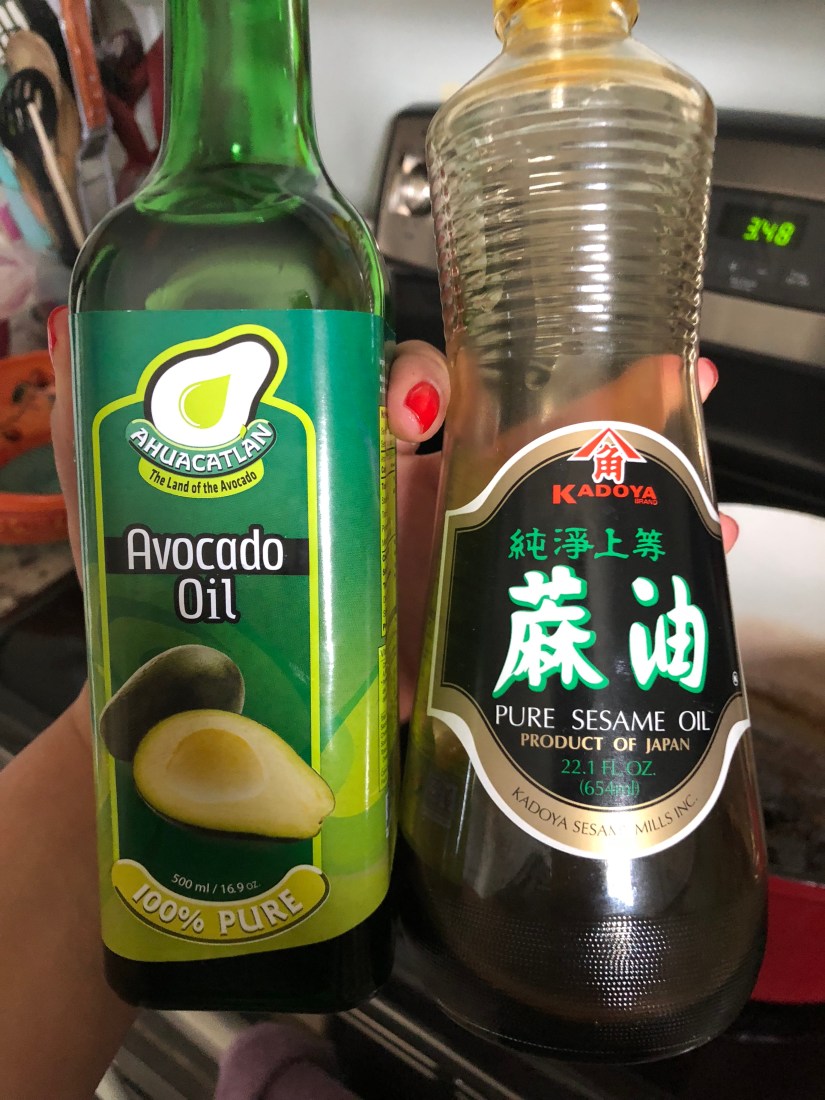
You want these to gently caramelize while you get the rest of your ingredients ready. A key to a good onion based soup is to really give your onions time to cook. This can take, at a minimum, 20-30 minutes and requires oils with a higher smoking point. I’ve recently started using avocado oil because it’s has similar healthy properties to EVOO but has the needed high smoking point. I also put in a splash of sesame oil because I love the way it smells. Even though I know it’s more of a Japanese thing than Chinese.

+MaWdNUuQ4OJfQ6uxa7NDA

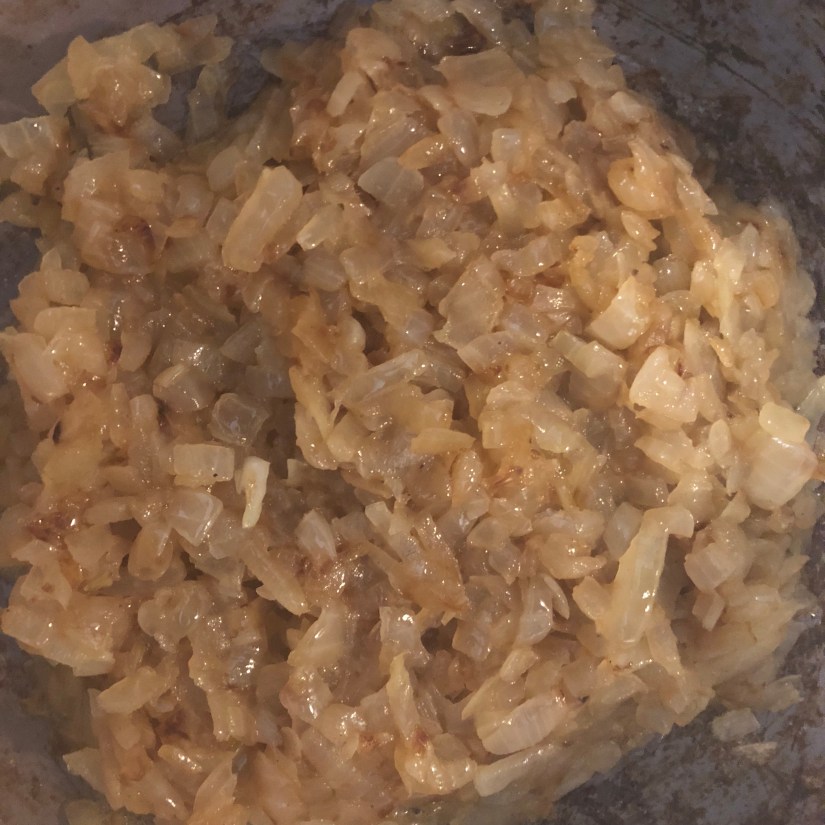
I can not stress enough how important cooking your onions all the way down is. I know it’s tedious and I know you think they are done. But they aren’t. Give them that extra ten minutes. Your mouth will thank you.

ARS6aWozTUaQDbboQS97Tw

In order to not loose patience with my onions I usually reserve some of my prepping tasksfor the time that they will be cooking. In this case I grated up some more ginger and garlic, which doesn’t take very long thanks to the I See Spain grater plate. Also, it could have been done when I initially grated up the ginger and garlic. I just love using it so much that I didn’t mind the extra step. And since I had some time to kill I had a lovely photo session with my shiitakes.

fullsizeoutput_5a0e

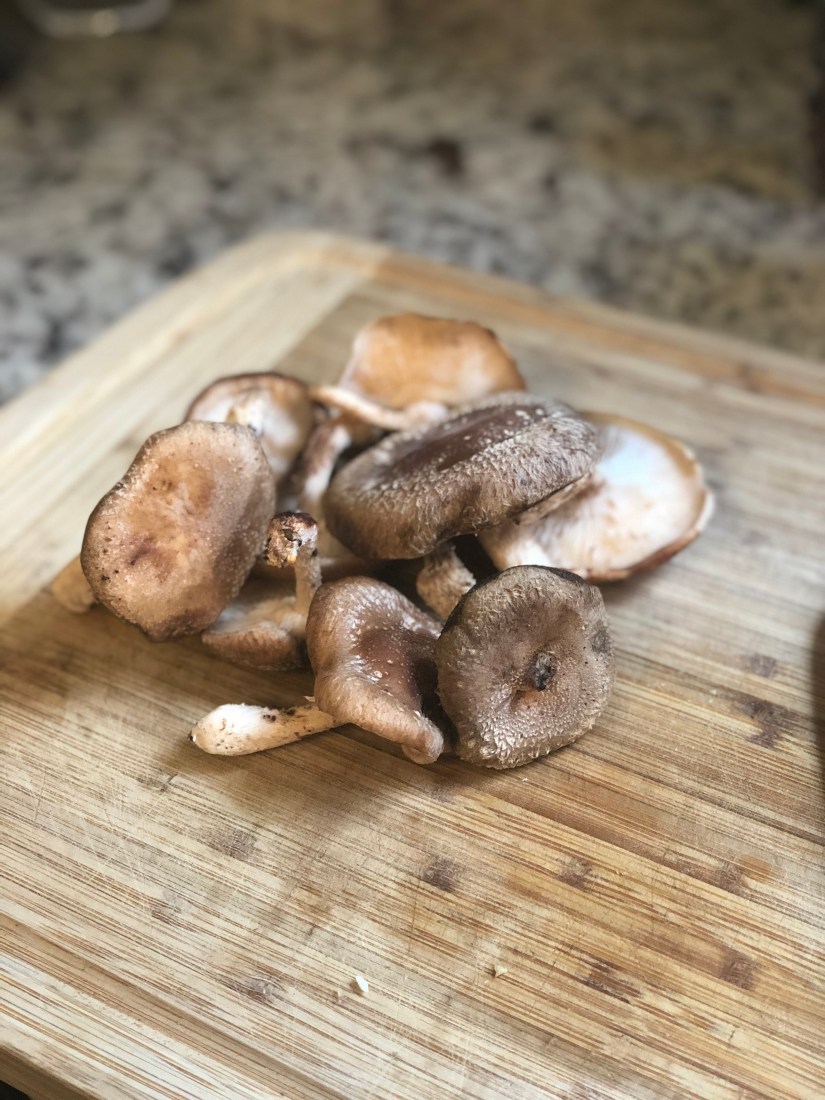
Wipe your mushrooms down, don’t rinse them as this makes them slimy. Then just cut them into thin strips. I include the stems. For those of you that don’t like mushrooms you can opt not to include them or swap them out for baby corn or bamboo shoots.

m54WtQYtQ6uEScUxK%kpNQ

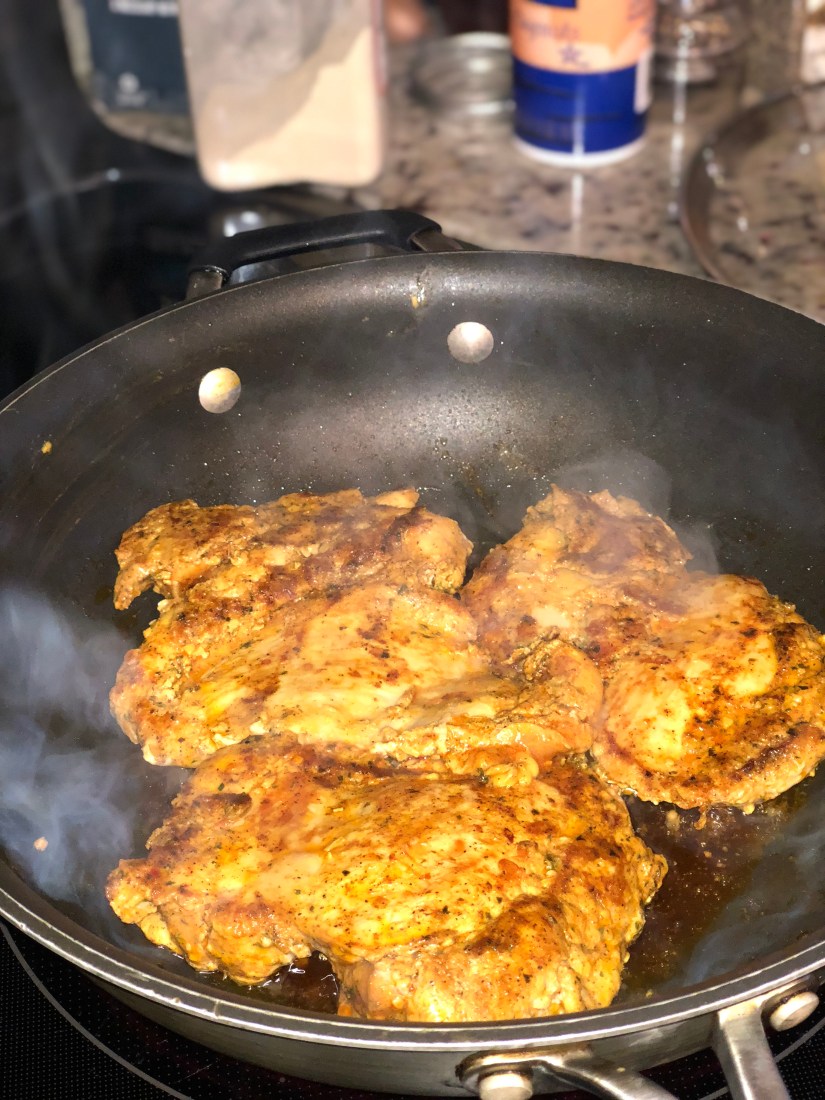
Once your onions are cooked things start moving along pretty quickly. Turn your heat all the way up and add in that extra garlic, ginger and some salt and pepper to season your onions. You don’t want these to cook too long and burn so immediately add in your chicken and give things a very good stir.

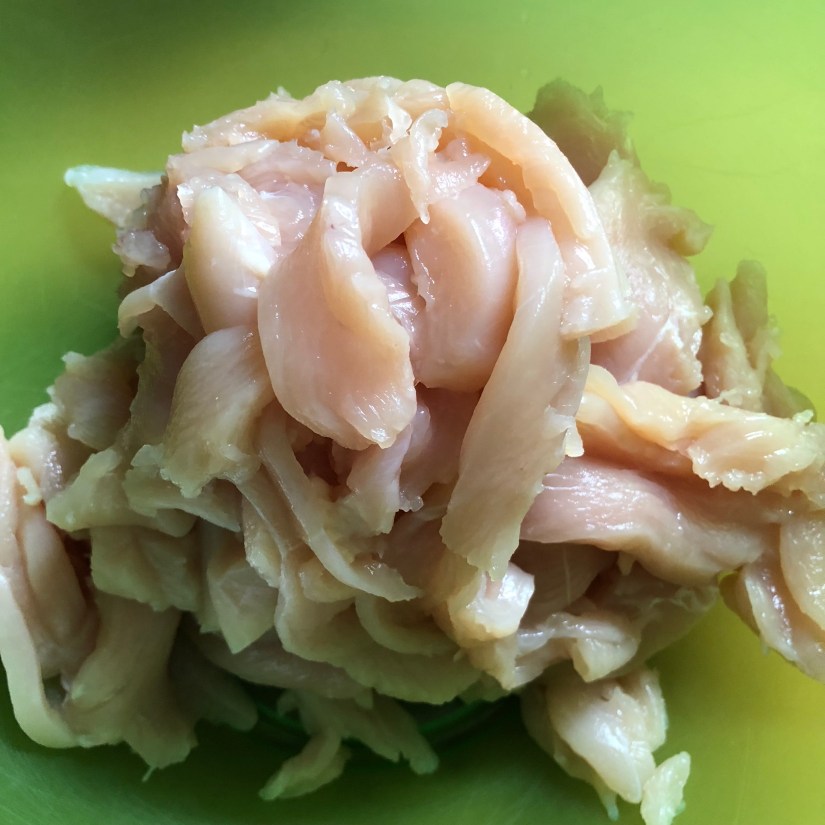
Your chicken will probably start to break up. This is perfectly fine and to be expected. You can even use your spatula to break up some bigger pieces. The idea is to have small spoon sized morsels of chicken. Keep moving the chicken around until it is fully cooked and starting to dry out.

D18bppAFTlKDNPnwwnFV2A

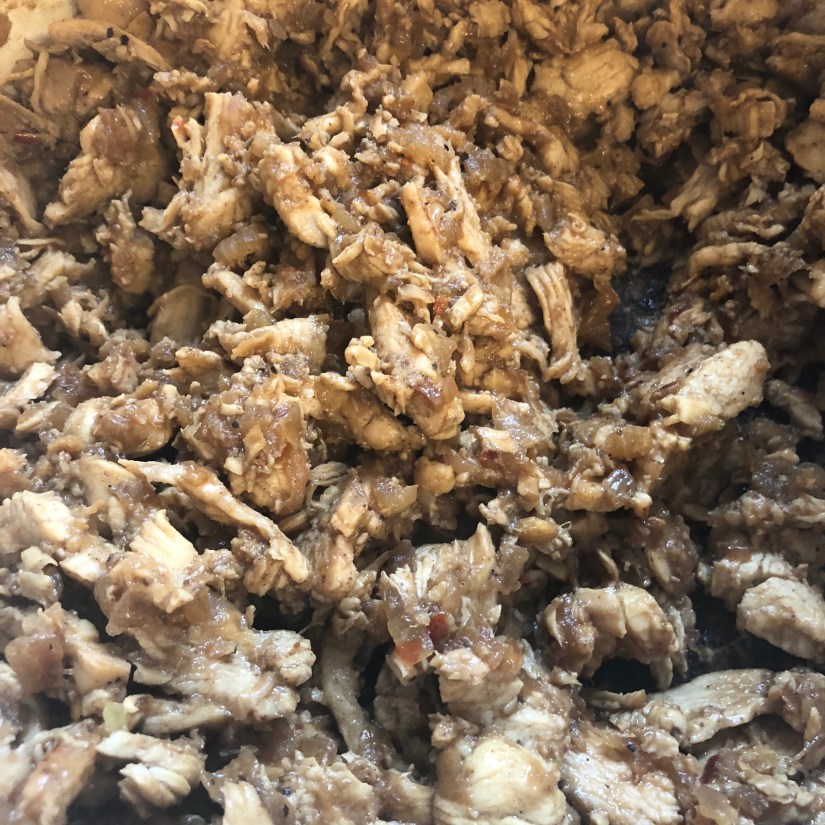
Don’t worry about things sticking to the bottom of the pan. We are going to get this off in a bit. First add in your mushrooms and let them cook down, lower your heat to medium. and start adding in small splashes of chicken stock to deglaze the bottom of your pan.

C0jQII8iS9eKyYIlu8ciNw

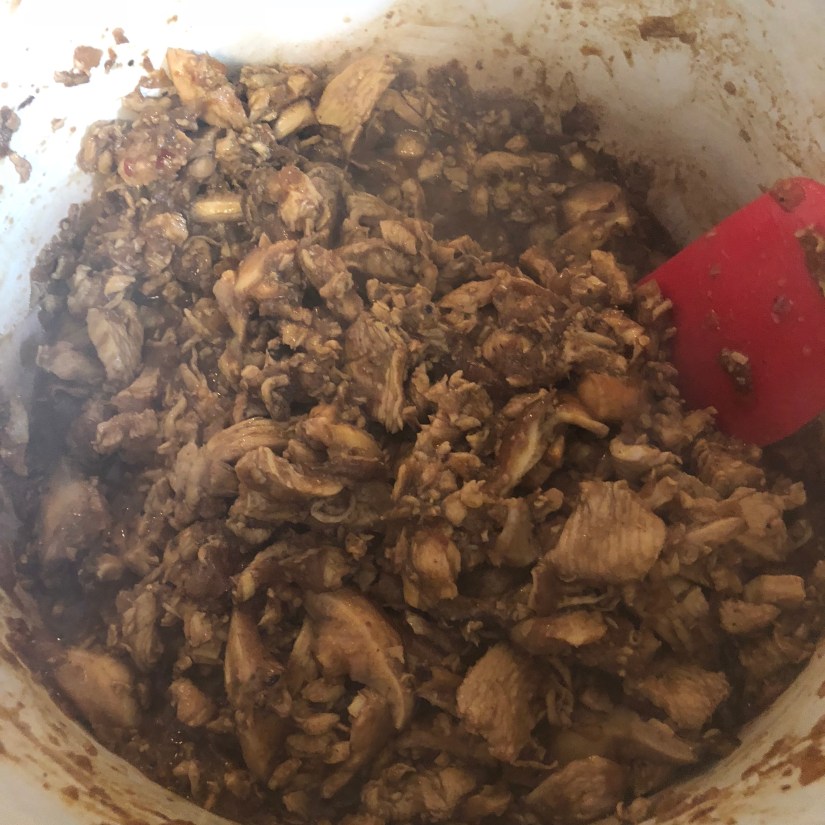
Once you have your pan nicely deglaze add in the rest of your stock and let it simmer for as long as you can. I usually like it to have a couple of hours so that all the flavors can marry together. Taste, taste, taste to make sure things are coming together the way you want!

ycPD4G9GSjOKzhR90jftjA

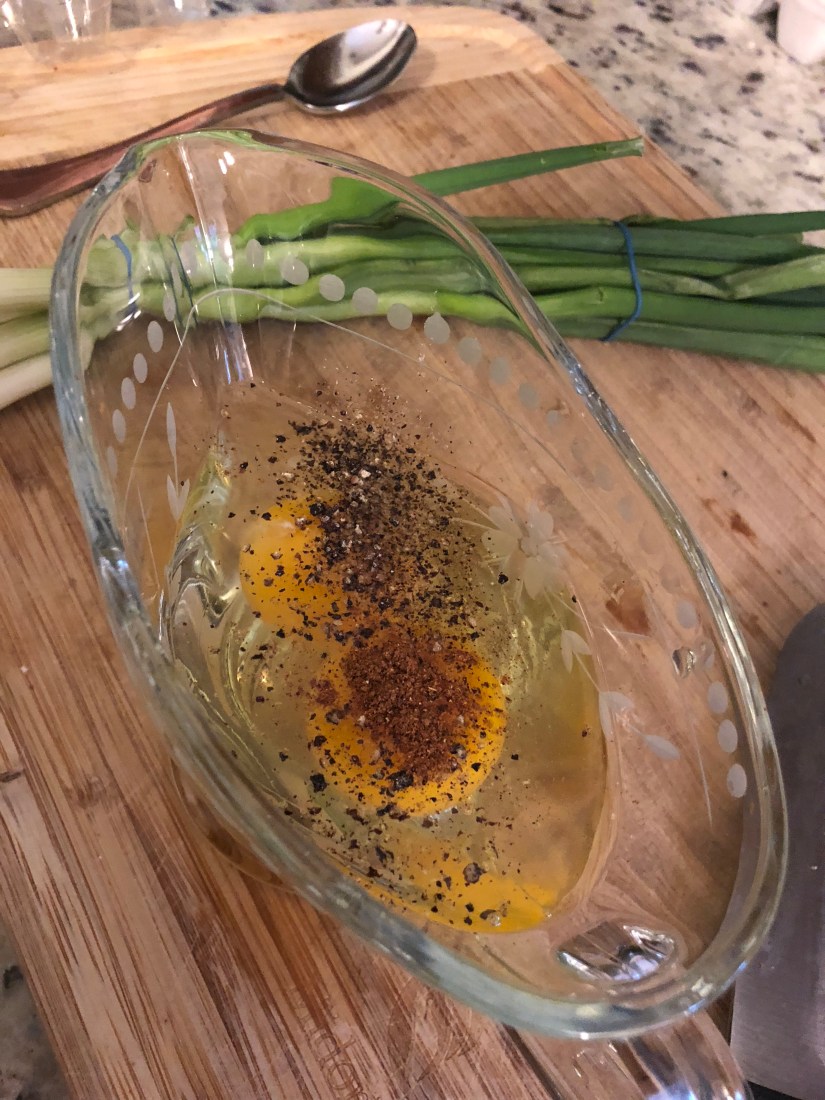
Once you have your soup where you want it bring it back up to a roaring boil and get ready to add in your eggs. Whisk them up in a measuring cup with salt, pepper and a pinch of your asian five spice. I couldn’t find my measuring cup so I used a gravy boat.

XmhzxVwJTr6KGyUtUiHHSg

The key to this is to keep your soup moving and pour slowly. Normally this is something that I can do on my own but because I wanted to get a boomerang I asked Lloyd to help. So now, if you ask him, he made this soup. You don’t see my hand moving the spatula but I should have been. Moving your soup around ensures nice stringy bits of egg as opposed to clumps of scrambled eggs.

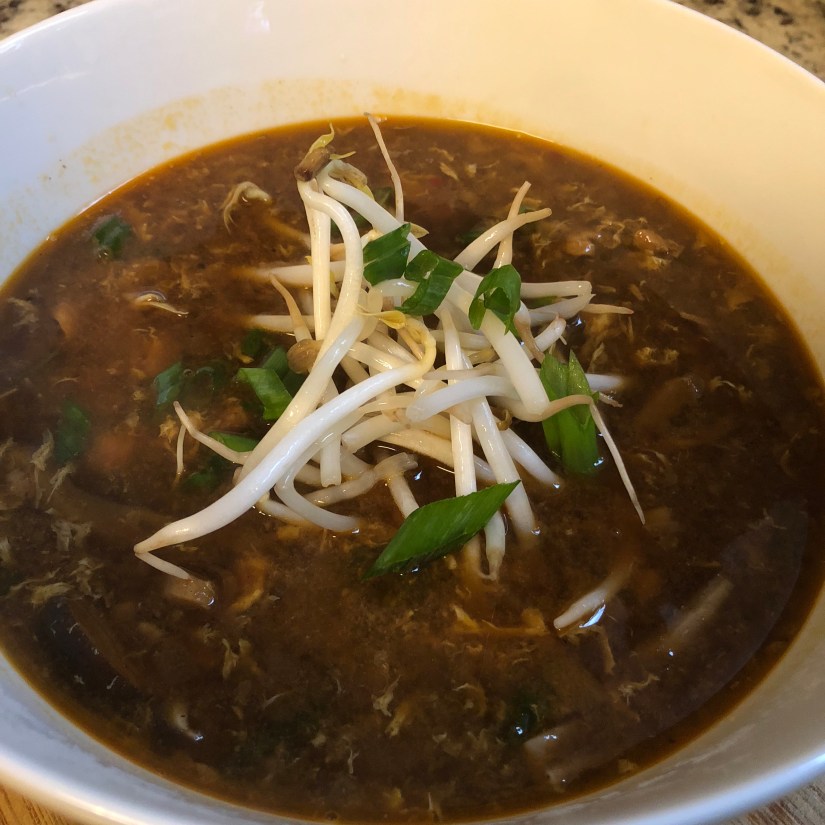
The eggs cooks almost instantly so as soon you pop that in you can turn the heat off and serve. We are always looking for low carb alternatives so instead of fried wonton strips we topped our soup with bean sprouts which are just as crunchy and don’t get as soggy when sitting in the soup.

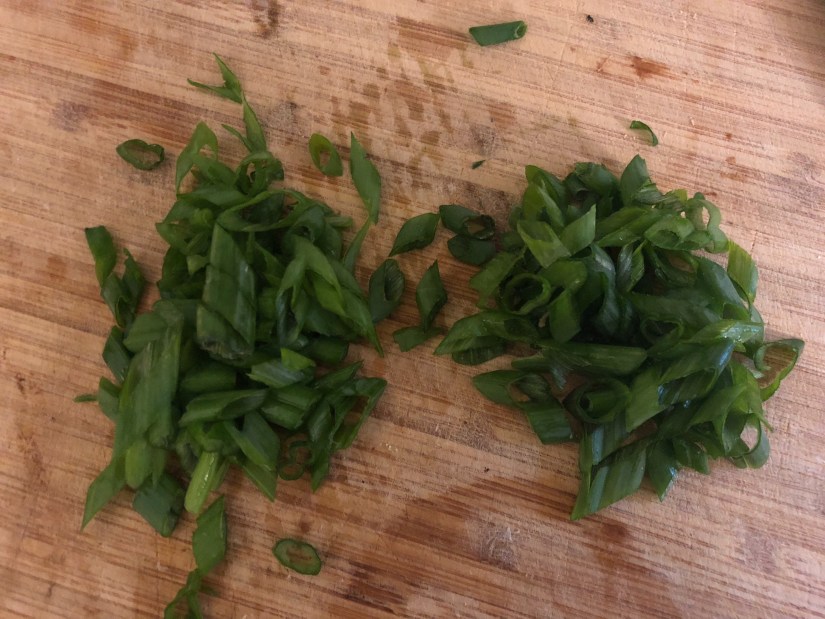
I also sprinkle on some scallions because I like that little pop of green as well as the fresh tangy, onion taste it adds to the flavor.

zt9fp9woqdgp7oiuoi9otq.jpg

Serving is up to you though. If you want to top it with water chestnuts and wontons than go for it! You do you!

TV1vZvpMTuiWKYcu7n6N1A

I used about 2 lbs of meat because I knew we would eat this all week long. So this recipe feeds 4-6. But feel free to half this to something more manageable. Or double to feed a large group.

Marinade Ingredients:

  1. 1 knob of ginger, grated
  2. 4-5 grated cloves of garlic
  3. 2 Tbsp asian five spice
  4. Salt and pepper to taste
  5. 1 Tbsp crushed red peppers
  6. 1 Tbsp of rice wine vinegar
  7. 2 Tbsp soy sauce

Soup Ingredients:

  1. 2 lbs chicken breast
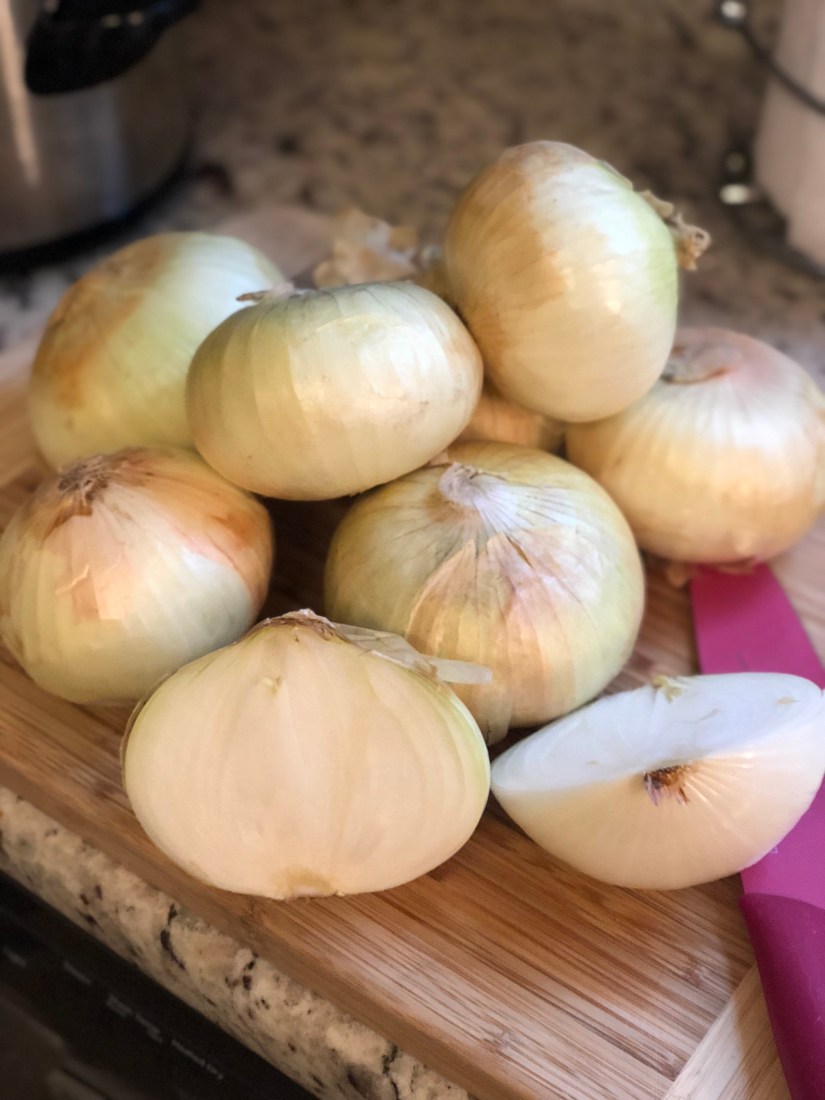
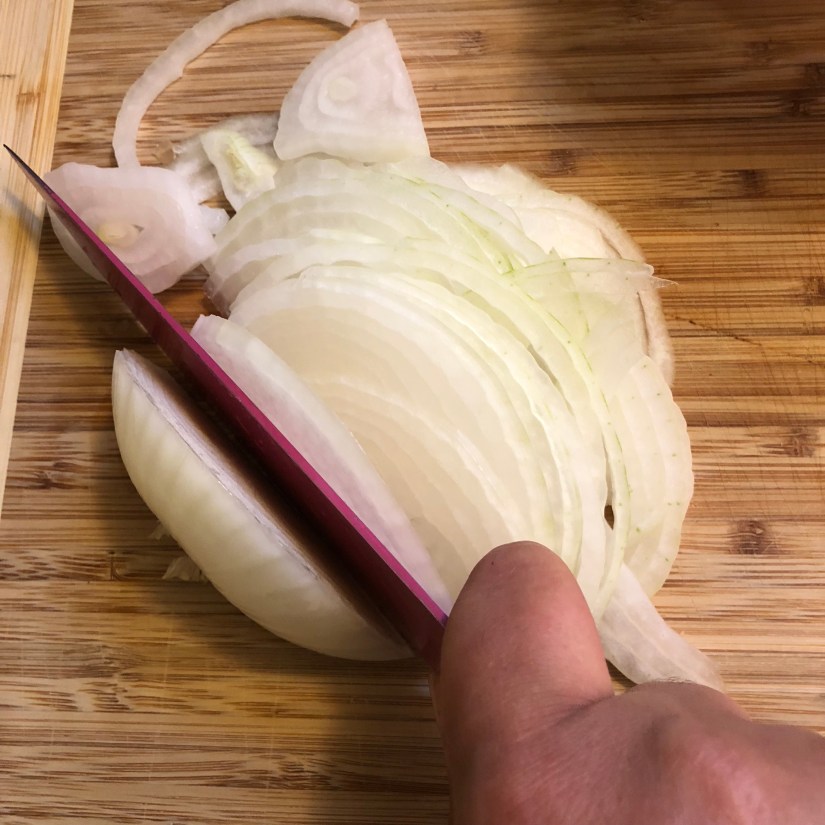
  2. 1 large white onion
  3. 8 oz shiitake mushrooms
  4. 2 boxes of unsalted chicken stock
  5. Excess ginger and garlic reserved from marinade
  6. 2 eggs, well beaten
  7. 1 bunch of scallions
  8. Bean sprouts

Recipe:

  1. Thinly slice chicken breasts and toss together with marinade ingredients. Reserve about a teaspoon of grated garlic and ginger. Set chicken aside to marinade.
  2. Dice one large white onion and cook on a low heat in oil with a high smoking point and a dash of sesame oil.
  3. Julienne shiitake mushrooms.
  4. Once onions are fully cooked. Turn heat up and add reserved ginger and garlic to pan.
  5. Immediately follow with marinaded chicken strips and stir frequently. Chicken will begin to break up.
  6. Once chicken is fully cooked and starting to dry out turn your heat down to medium and add in mushrooms. Incorporate completely.
  7. As mushrooms begin to shrink and sweat start deglazing your pan with the unsalted chicken stock by adding in small amounts and scraping the bottom.
  8. Once fully deglazed pour in the rest of the stock and let simmer for 1-3 hours. Taste during this time to help balance flavors.
  9. Beat and season eggs with salt, pepper and a pinch of asian five spice.
  10. When ready to serve bring soup to a roaring boil and slowly pour in your beaten eggs while constantly stirring the soup.
  11. Serve hot with scallions and bean sprouts for garnish.
Food, recipe

Asian Five Spice

Sometimes I get really annoyed by how expensive spice mixes can be. They are definitely convenient but marked up. So I’ve gotten into the habit of making my own for some of the easier ones. A very easy one to start with is Asian Five Spice. Easy because the clue is in the name. It only has five ingredients.

fullsizeoutput_5a10

Another nice thing about making your own spice mix is that you can get the balance you like. We prefer spicy food so I use an equal ratio of szechwan peppercorns in my mix. Although a lot of places will recommend less peppercorns. Use what makes your taste buds happy.

RrSp4f6gQxuaCYBOLxu5LA

I have a coffee grinder that I reserve just for blitzing my spice mixes. I did the cinnamon and whole star anise first because they are the biggest, and hardest to crush up. Then added in the rest. It’s a lot easier to get all of your spice powder out with a small brush so if you are heading down the make your own spice blend road I suggest getting one.


Storing is easy. Use any airtight container you have at hand, this could mean a mason jar or rubber maid container, or even a zip-lock bag. I used up the last of my star anise for this so I didn’t make a very large batch. If you don’t have whole star anise feel free to substitute in the seeds (as I clearly did). Use about a 1/4 tea spoon for every pod you are replacing. But as long as you have the proportions right you can make as much or as little as you want.

5ht0ZsrGR62pbfuA2LDECg

Ingredients:

  1. 1 stick cinnamon
  2. 3-4 star anise pods
  3. 1/2 tsp of cloves
  4. 1 tsp of szechwan peppercorns
  5. 1 tsp of fennel seeds

Recipe:

  1. Blend all ingredients into a fine powder in a coffee grinder or blender.
  2. Store in an airtight container. Lasts for up to a year.
  3. Use in any asian inspired dish, best with Chinese cuisine.
Food, review

Hoke Poke; Richmond, VA

Richmond, VA is very much a foodie town. But there has been a lack of proper poke for years now. Finally my wish has been granted and we have one in the form of the newly opened Hoke Poke in the Short Pump area of RVA. I’ve been three times in the last week.

1uTgmPYvSfuGeADcOjmTYA

So in the vein of Chipotle this is a pick your base and add your mix-ins and finish off with an array of toppings and sauces type place. But of course instead of marinaded beef, chicken and pork you get raw fish! Delicious, perfectly marinaded raw fish!

Rice is the most common base for a poke bowl. The Sushi rice is your typical white rice but the bamboo is a more floral and surprisingly green rice. As well as low carb options, specifically kale and mixed greens. There is a wide array of proteins, both raw and cooked. Salmon and Tuna make up the back bone of their options. With spicy tuna and a sweeter version of both salmon and tuna also available. The mix in are a variety of fresh vegetables and fruits. You get four mix-ins with a large bowl and three with a small.

mkOR1M9MSDmrz8VYkEkSzg

The next bar you are going to hit is the toppings bar. Which has some things you would expect; cilantro, wasabi and pickled ginger. But also some more unusual things: seaweed salad and crushed flaming hot Cheetos in particular. You can have as many of these as you want, but the avocado is an up charge.

oj7Keh7MTxKC1NjRfauKNQ

Lloyd and I both went for the spicy tuna but I used a lot more toppings than he did. I also decided to try the bamboo rice. It was definitely filling and very tasty. The next time I went I opted for the mixed greens as a base and I think that might be the way to go. But I’m a weird Indian and don’t particularly like rice.

vp+WAPVzSkOzd5srfG9QjA

I must also mention the boba milk teas! We tried the Taro and the Matcha. The boba was perfect and the flavors in the teas were rich and well balanced. I sampled the Thai tea and the golden milk tea on another visit. And if you go I would recommend the Thai tea, its definitely worth the calories. For non-tea drinkers you have to try their lavender lemonade. Have to.

9nWVHtFcThS2IOO4ogYbUA
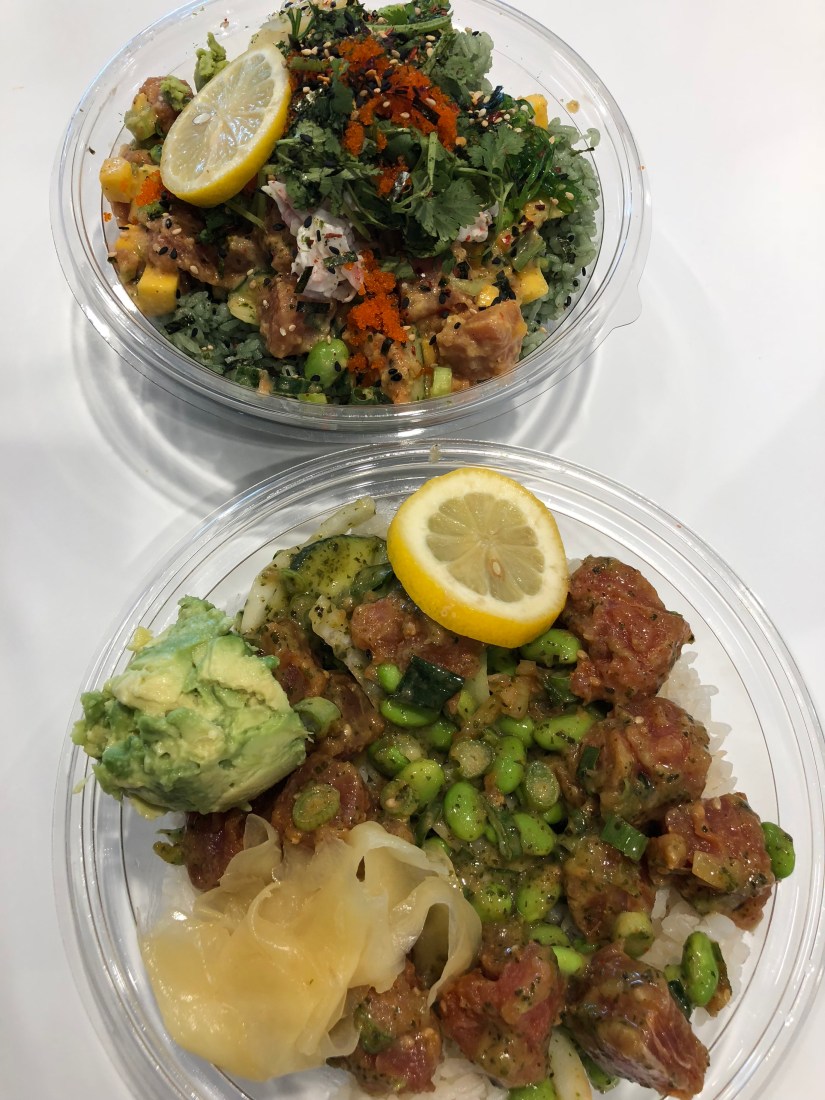
If you live in the Richmond, VA area or have a Hoke Poke near you I definitely suggest a visit. If you haven’t had Poke and are a sushi fan than you should absolutely figure out a way to get this delight in your mouth hole.

4TPJvtS0SnCegzMM3nzseA

All in all, a llavender llama, lavender lemonade cheers to Hoke Poke! Thanks for coming to RVA!

Food, recipe

Turkey Salad Wrap

I had to make a quick lunch the other day and luckily I had a small turkey breast in the fridge which I decided to dice up and make into a salad. This time of year it’s easy to find these hunks of ham and turkey. I suggest grabbing them and freezing them for use later on in the year.

Kr7f1vHDT66jrWaSz9qzVQ

Cube the meat and add in some mayo. I know that in some places salad doesn’t mayo. Those places aren’t the south. That being said you don’t need a ton of mayo, just enough to light coat the meat.

ugOShiTTTdOpqEt+2PkzvA

Next it’s time to add any mix-ins you want. I used a trip of bell peppers, some chopped chives and parsley, a little stone ground mustard (Lloyd’s favorite), and pepper. I don’t typically add extra salt as deli meat is usually salted well enough.

CRR8KkrASSiSwfq803onzQ

Give it a good mix until everything is well coated. See, you don’t need a ton of mayo.

IW0NFoGhTiiDEmOhOh1UWA

Next it’s time to assemble. A little lettuce, a little shredded cheese and you are ready to go!

Roll it up and serve! Any extra salad can be kept in the fridge for about 3-4 days. You could also make these ahead of time and eat them for a few days. If you spread the salad greens evenly across the wrap it will stop them from going soggy from the mayo.

7EV%NFKHT4Okzadsp4MVkg

Ingredients:

  1. 1 small package of spiral cut ham or deli trukey
  2. 3 small bell peppers (red, yellow and orange) or one large one
  3. 1 Tbsp chives
  4. 1 Tbsp parsley
  5. 1 Tbsp stone ground mustard
  6. Pepper to taste
  7. Wraps
  8. Salad greens
  9. Shredded cheese

Recipe:

  1. Cube your meat
  2. Add in your mayo, bell peppers, chives, parsley, mustard, pepper
  3. Stir well to coat everything evenly
  4. Place salad greens, cheese and turkey salad on wrap and roll up
Food, recipe

Garlic and Pancetta Pasta

Recently I went to the Virginia Wine Expo and while slightly tipsy I bought an I See Spain grater bowl. It is an absolute dream and I made this pasta to showcase it’s greatness!

S+29Mbt3TQS2OUw5XQt8DA

Those raised ridges on the bottom are very sharp and actually grate garlic and other roots, hard cheese and chocolate in seconds. With this dish I used garlic. Add in a little olive oil to the bottom of your dish to help with grating.

mMR6zR3MTz+JMOzG5uy86w

The two cloves only took me a few minutes. In fact the pancetta that I had in the pan had barely started cooking before I was done. Which brings me to the pancetta step. You want this to cook up nice and crispy so do it at a low heat stirring frequently so that nothing burns.

h2Xns2v7QEyMpwQ2zuTuMA

Cook your pasta in boiling water while the pancetta is cooking. The pasta I used called for boiling for about 5-7 minutes but because I was going to finish it off in the pan I only boiled it for about four minutes. And then added it when the pancetta looked like this.

H3eW%QDnRK2LSUQl9R5C5w

Next I added in the pasta and some diced cherry tomatoes.

I3ePSwqbSzyo2JXzcRvBlA

And some parmesan cheese. Because cheese is life.

nsEMhx00S4WByLFIhJVHZw

A healthy splash of your pasta water deglazes the pan and finishes cooking this pasta.

%9j1rxk5Sd2cDiKYRiD+yg

Once the excess moisture as cooked off transfer it into the grater bowl and stir around so that the garlic and oil coats everything.

FHynm4+eRiqTBooQ16SaFA

I also sprinkled in some fresh chopped basil  for color and flavor.

Ingredients (feeds 4)

  1. 1 package of pancetta
  2. 2-3 cloves of garlic
  3. Olive oil
  4. 1 cup chopped cherry tomatoes
  5. 2 cups uncooked pasta
  6. 5-6 chopped basil leaves

Recipe:

  1. Grate garlic and add to olive oil at bottom of serving bowl. Or use an I See Spain grater bowl if you have one.
  2. Boil pasta per the directions on the packet. Shave of 2-3 minutes so that you can finish cooking it your pancetta.
  3. Add pancetta to a warm pan and cook on low heat until crispy and cooked through.
  4. Add your pasta into the pancetta pan.
  5. Toss in cherry tomatoes and parmesan.
  6. Use about a half cup of the pasta water to deglaze and finish cooking your pasta
  7. Transfer into serving and bowl and toss well to coat with garlic and olive oil.
  8. Sprinkle on some chopped basil.
Food, recipe

Shrimp Stuffed Jalapeños Wrapped in Bacon

I was tooling around Trader Joe’s when I saw these frozen tiger shrimp and inspiration struck! I had some fancy Woodbury Farms bacon at home as well as some jalapeños. I was going to take that shrimp and make something delicious!

IMG_1394

So, I knew from personal experience that these Jalapeños are super spicy so I wanted to neutralize some of the spice.

IMG_1397

I do this with a mix of vinegar and water and letting them soak. I’ve read that you can use lemon-lime soda (like Sprite) but have never tried that. To get started you need to halve and remove the pith from your peppers.

IMG_1399

Removing the pith is much easier if you use a spoon. It’s dull it hurts more to quote Alan Rickman in Robin Hood: Prince of Thieves. All joking aside the pith is where the spice hides so remove it.

IMG_1402

Next place them in a bowl and let them soak for about an hour in a 1:3 vinegar to water mix. The longer they soak the less spicy they will become.

IMG_1403

Don’t worry about getting all the seeds off before you soaking. They will rinse off easily at the end.

IMG_1404

Take advantage of that soaking time by letting your cream cheese soften, your bacon come to room temperature and your shrimp defrost. Once your cream cheese is soft you can go ahead and make your filling mix.

IMG_1407

I used chopped parsley, fine diced shallot and red bell pepper as well as some minced garlic, salt and pepper.

IMG_1408

I gave it a really good stir and then once everything was at room temp I got myself all set up to prep my peppers.

IMG_1410

I arranged my peppers so they were reasonably back together, or at least so that the sizes matched up and filled them with the cream cheese.

IMG_1412

Next I sandwiched a shrimp that best matched the jalapeño in size and shape in between the two halves. It was so cute all snuggled up in there.

Next it’s time to wrap your bacon around your peppers. In retrospect I would have used toothpicks to hold this all together. Live and learn.

IMG_1417

Put in a cold oven and set to 400 degrees Fahrenheit. They will cook in about 30-40 minutes. Just remember that the cheese inside will be like molten lava so wait a few minutes before you chomp down.

IMG_1422

Ingredients (makes 6):

  1. 6 large jalapeños
  2. 6 tiger shrimp
  3. 6 slices of thick cut bacon

Filling ingredients:

  1. 4 oz of cream cheese
  2. 1 Tbsp of fine diced shallots
  3. 1 Tbsp of fine diced bell pepper
  4. 1 Tbsp fine chopped parlsey
  5. 1 Tbsp minced garlic
  6. 1 Tsp salt
  7. 1 Tsp pepper

Recipe:

  1. Prep your jalapeños by slicing in half and removing pith. Soak in a 1:3 mix of vinegar to water and leave for 1-2 hours.
  2. Mix your filling.
  3. Stuff each half with cream cheese.
  4. Place shrimp inside of two halves of jalapeño.
  5. Place in cold oven and set to 400. Start checking after twenty minutes. Usually takes 30-40 minutes to cook but you don’t want to let them burn.
Food, recipe

Savory Overnight Crockpot Oatmeal

We are absolutely a savory over sweet breakfast family in the Gallinaik house. You may have read my post on Savory Brunch Oatmeal which is perfect for one or two people. But if you have to feed a crowd than it’s time to bust out that crockpot!

6QTOELcFTbiLclLWMH6ZVg

This is so amazingly easy. I poured in oats, unsalted chicken stock and some butternut squash to give it some extra texture/flavor. Next I added in some leftover seasonings I had lying around the kitchen. I tossed in some italian seasoning as well as the usual salt, pepper and garlic.

kxZMY20CQV+S9EuAZrHszw

I shaved up the last of the gruyere cheese I had and added in some smoked sun dried tomatoes for color and flavor.

Pv34P0o1QAmFn5hF9hXXlQ

All that was left to cover and let cook on low for five hours. My crockpot automatically switches to warm so we were all set for delicious aromas come the next morning. This is what I came down to, the butternut squash was fully cooked but not very well incorporated.

SNxoSBhsTDKmT9Ws5qv+lA

After some brisk stirring I got it all smoothed out. It took a little elbow grease and I scraped down the slightly charred sides and stirred that in as well. I did add in some extra unsalted chicken stock to help loosen things up.

nzxvqpdcscid5nismrdopw.jpg

We had a special treat for topping this time around. Lloyd’s best friend and best man, Steve, makes his own honey and sugar smoked bacon so he fried some up for us. As well as some home made sausage and fresh chicken eggs. In fact his family have a little farm where these amazing things are for sale. Check out Woodbury Farms if you ever get a chance.

uzVyPgeSQqqGNAhJ0OM+xA

We laid out the breakfast meat next to the crockpot and let people help themselves. It was a great way to serve a large group breakfast with very little effort.

q6ktFNvkSr+rN8aVZ7XLXw

All in all it was a yummy and simple way to break our fast. It’s very easy to make this sweet if that’s what you prefer. Sub the squash for apples/pears. And the spices I used for cinnamon and sugar. I would switch out the cheese for a little maple syrup as well. And definitely avoid the chicken stock, water and milk will do you just fine. Enjoy! And as usual, please tell me how you would make this your way!

Ingredients (serves 8):

  1. 2. cups of rolled oats
  2. 1 box of unsalted or low sodium chicken stock
  3. 2 cups of cubed butternut squash
  4. 8 oz sun-dried tomatoes
  5. 1 Tbsp Italian seasoning
  6. Salt, pepper and garlic powder to taste
  7. Eggs and breakfast meats as wanted

Recipe:

  1. Add all ingredients to a crockpot and give it a good stir. Don’t be afraid to taste for salt. Crockpots are notorious for producing under salted meals so don’t be worried if it tastes a little salty.
  2. Set on low and let cook for five hours. If your crockpot switches to warm that’s great. Otherwise plan to get up 20 minutes early to turn it back on ad let it heat up before serving.
  3. Serve with eggs, breakfast meats. Feel free to top with chopped cherry tomatoes, avocado or anything else for garnish.


Food, recipe

Trader Joe’s Chicken Shawarma Wrap

fullsizeoutput_5995.jpeg
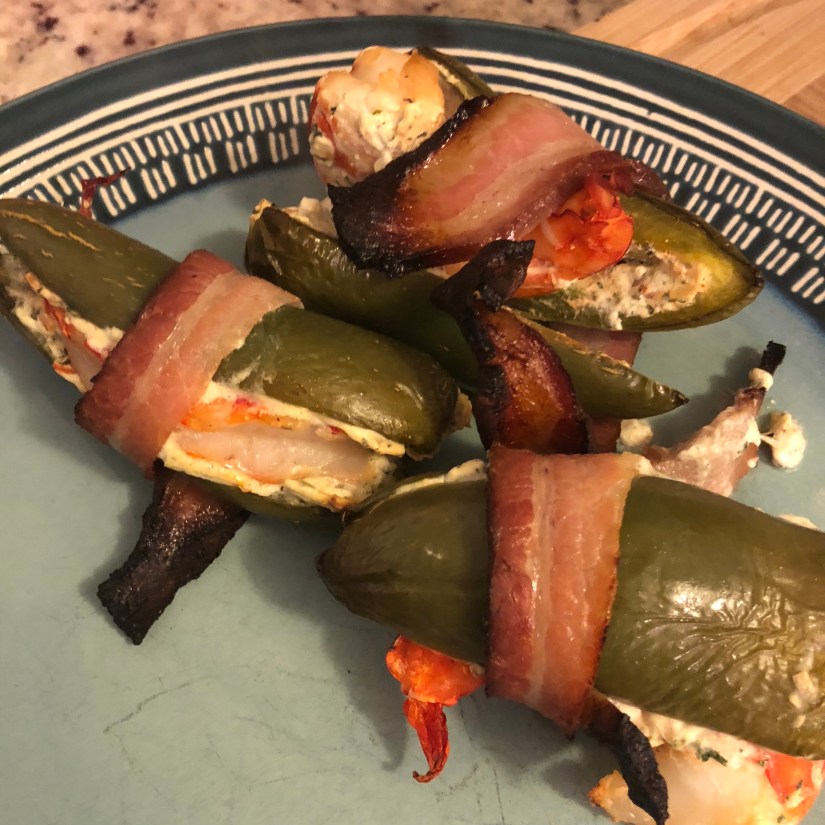
Sometimes you have the time to make a complicated meal, like my Herbs de Provence Chicken with Roasted Vegetables and Ratatouille but sometimes you want something quick and easy. When I want to get dinner ready quickly Trader Joe’s is usually my go to spot. It’s the closest grocery store to my house and I know where everything is. I can pick up a package of meat, some veggies and a carb and have dinner ready to go within thirty minutes of getting home. This week I found a new meat! Shawarma Chicken Thighs!

DuXYsd0USxCBSyQwajg

I sometimes crave Indian food but don’t have the time or energy to fix it. So when I saw this packet I was immediately excited. I’ve used these pre-marinaded packets from Trader Joe’s before and they are endlessly versatile. But I knew exactly what I wanted to make with these so I did a quick lap through the store and picked up some sauces and a packet of garlic naan and sped home.


The Zhoug sauce is very similar to an Indian green chutney with garlic, mint, chillies and coriander. And the Tzatziki is like Indian raita, minus the cumin and add in some dill. So not identical flavors but comparable in a pinch. And of course I had to have garlic naan. I know they sell regular naan at Trader Joe’s but I just don’t understand why anyone would want the plain stuff when there is garlic to be had.

Mi533dEjTpCrzyrJSR9HhQ

I cooked the chicken in a non-stick pan, using low sodium chicken stock to deglaze, took it out of the pan and let it rest before cutting it into strips.

fullsizeoutput_5994

While the chicken was cooking I threw my naan in the oven to defrost 350 fahrenheit on a baking tray for about 5-6 minutes. And chopped up some leafy greens and cherry tomatoes I had in the fridge.


Now all that was left to do was assemble and enjoy! I would point out that virtually and combination of chicken, sauce, vegetable carb could be used to make this more to your taste. The Joe makes a delicious pesto chicken, for instance, which could be paired with tomatoes, greens, mozzarella on focaccia bread and drizzled with a good balsamic reduction.

b8n7DbWHTzWSF8Q7LD9Mug

I should also mention that I loved this chicken so much I went back for a second packet later in the week and made salads with them instead of wraps because carbs are evil. I used the same base of greens and cherry tomatoes and the two sauces I mentioned above.

IMG_1379

I also added in some petite diced yellow bell peppers and half a shallot for color, flavor and texture.


See it is endlessly customizable! I’d love to hear how you you made this idea your own with this chicken or any other! New ideas are always welcome!

Ingredients (makes 4):

  1. 1 packet of Shawarma chicken thighs
  2. 1 container Zhoug sauce
  3. 1 container Tzatziki sauce
  4. 1 packet garlic Naan
  5. Cherry tomatoes
  6. Fresh greens
  7. Unsalted chicken stock

Recipe:

  1. Heat a non-stick or cast-iron pan to medium hat, gently drizzle with olive oil and place meat in pan. Leave it alone until you can see that meat has started to shrink. Deglaze with a little chicken stock. Flip and continue to cook. Keep covered for a portion of the time to lock in moisture. Depending on your pan, thickness of the meat and heat of your stove total pan time could take from 20-35 minutes.
  2. Chop your cherry tomatoes and salad
  3. Take your chicken out of the pan and allow it to rest
  4. Heat your naan in the oven according to package instructions
  5. Chop your chicken into thin strips
  6. Assemble by putting salad on your naan, placing the chicken on the salad bed and drizzling on dollops of your Zhoug sauce and Tzatziki. Sprinkle on some tomatoes. You could also add some onions or coriander to give it a little extra Indian oomph.
Food, recipe

Herbs de Provence Chicken with Roasted Vegetables and Ratatouille

Sometimes you want a meal that isn’t too heavy but is still delicious. Bonus points if it’s actually fairly simple. The most complicated portion of this meal is the Ratatouille. But you can make it ahead and freeze or refrigerate until you want to use it. I made this for a large group dinner so the portions are a bit big. Feel free to scale it back to something more manageable if need be.

As usual we will start with a brief vegetable photoshoot.

fullsizeoutput_592d

But seriously the first step is always your mise en place. Cube your zucchini, squash and eggplant and sprinkle with salt. This is going to help pull the moisture out so that your veggies retain their firmness and don’t get soggy and gross when you start cooking.

NHt3xMwGQAe6npzOmJ+elw

After about twenty minutes pat the cubed veggies dry on some paper towels. During those twenty you can chop of your tomatoes, onion and oregano and heat up your dutch oven.

cBmIqFJ%SjKXvxuTNbIyCA

Next up is lightly pan frying all your veggies, just one more step to prevent everything from becoming one gloopy mess. Plus they look so glossy and delicious once they are ready.

dy74zzaSTZ6JcovbOUjPjA

Now you have a pan whose bottom is covered in chunks of burned vegetables, time to deglaze! For some reason I find this very soothing. I also use the deglazing time to cook my onions down.

r5KGmVrMRxip6jO6law2cg

Next step is adding in some freshly chopped tomatoes and oregano.

fullsizeoutput_592e

Use a can of tomato paste to add in a richer taste and once everything is cooked add your cubed veggies back into the pan.

UyUAZhWpQuuCljQB6aA

Cover with low sodium chicken stock and let simmer until all the flavors have married make sure that you adjust for salt and pepper early on. You can see the difference in the two photos. The second picture how much richer and thicker the tomato sauce has become.

4tFK4VnsTu+OACs1vpzZTA

Once your ratatouille is cooked you can bag it up and freeze it for later.Which is what I did. I also went ahead and marinaded my chicken and prepped my vegetables for roasting. Step one is finding a Herbs de Provence mix you really love. My go to is this one from Trader Joe’s. It also comes with the super cute spoon.

PgPi7xPST8uzLAfEnoDZ1Q

Cube some chicken breasts and cover in spices, olive oil, red wine vinegar, salt and pepper.

Tq2yrJRwScehtJv8DeamLg

Next step is your vegetables. I cut up green beans, radishes, mushrooms and I threw in some whole yellow cherry tomatoes. Because I was using these later in the week I wrapped the mushrooms before bagging them.

MQK7v2aDSzOc059qBF5Vkg

Once I was ready to roast my veggies I spread them out in a pan and chopped an onion up. I didn’t bag the onion with my other chopped veg because onions will pull the moisture out over everything and make them soggy. I coated everything in salt, pepper, garlic and olive oil before popping them in the oven.

tMkzPZrOSAuvkjsl+pKJ9g

I popped both pans in the oven and roasted them at 375 degrees for about 30-45 minutes.

I then put out all three dishes and let my friends plate their own meals and had a nice hunk of gruyere off to the side so people could shave on as much as they liked. I made it snow!

lq4Ngn6vRSOUDXhD58z8Fw

Ratatouille (serves 10):

Ingredients:

  1. 2 medium eggplants
  2. 2 yellow squash
  3. 2 zucchini
  4. Handful of cherry tomatoes
  5. 1 red onion
  6. 1 bunch of oregano
  7. 1 box low sodium Chicken Stock
  8. 1 can of tomato paste
  9. Salt, pepper and garlic powder to taste

Recipe:

  1. Cube your zucchini, squash and eggplant. Sprinkle with salt and let sit for 20 minutes
  2. Dice onions, chop tomatoes and oregano
  3. Pat zucchini, squash and eggplant dry. Fry in a little olive oil in small batches. Do not worry if pan becomes covered in brown bits of burnt vegetable. This will add to the heartiness of your gravy.
  4. Sautee onions and use chicken stock to deglaze your pan of all the lovely flavor left over from frying your veggies.
  5. Add in cherry tomatoes and oregano and cook down.
  6. Add your tomato paste and cook using small splashes of chicken stock to ensure that nothing sticks
  7. Add in your reserved zucchini, squash and eggplant
  8. Cover with chicken stock and adjust salt/pepper/garlic to taste
  9. Serve or freeze/refrigerate until ready to use. When reheating just place in a heavy bottomed pan and use some low sodium chicken stock to prevent sticking, if needed or if it becomes too thick. Remember to check seasoning before serving!

Herbs de Provence Chicken (serves 10):

Ingredients:

  1. 3 lbs chicken breasts
  2. 3-4 heaping Tbsp Herbs de Provence seasoning
  3. 1 Tbsp red wine vinegar
  4. Salt and pepper to taste

Recipe:

  1. Cube chicken
  2. Toss in rest of ingredients
  3. Freeze or refrigerate until ready to use or move straight to step 4
  4. Roast in oven for 30-45 minutes until fully cooked.

Roasted Vegetables (serves 10):

Ingredients:

  1. 2 medium carrots
  2. 8 oz mushrooms
  3. 8 oz green beans
  4. 8 oz radishes
  5. 8 oz cherry tomatoes
  6. 1 medium sized onion
  7. Salt, pepper and garlic powder to taste
  8. Olive oil

Recipe:

  1. Chop your carrots into sticks.
  2. Snap ends off green beans and chop in half
  3. Wash cherry tomatoes
  4. Wipe down mushrooms
  5. Chop radishes in half
  6. If bagging and using later than wrap your mushrooms in a paper towel to stop them from getting slimy.
  7. Chop onion and add to mix
  8. Season with salt, pepper, garlic powder and drizzle with olive oil. Toss well to make sure everything is evenly coated.
  9. Bake at 375 for 30-45 minutes


Food, recipe

Crockpot French Onion Soup

I find that my crockpot is endlessly versatile. Recently I’ve been using it make large batches of caramelized onions and from there it isn’t much of  stretch to turn your vat of caramelized onions into a delicious French Onion Soup. As long as you are okay with the delicious smell of cooking onions wafting through your house for a day or two. Step one is to acquire onions, arrange them artfully and photograph them.

fullsizeoutput_5937

Once the photo session is over it’s time to get slicing. This is easily the most time consuming step in the process. But it can also be a nice cathartic release if onions make you cry. When I slice eight onions I indulge in a nice cry and end up feeling much better when the task is done.

kp%vg23STryhs9k9JTFQ+A

I start the crockpot heating while I slice and put in a knob of butter and a slug of olive oil. You don’t need a ton, just enough to make sure things don’t stick as you are getting the ball rolling.

XeP9PjaNR%SRNru6xO6Kiw

Once you cram all the onions you sliced into your crockpot it’s time to sit back and relax. I started the crock pot a few hours before bed time, gave them a couple of stirs, covered my crockpot and hit the sack. When I woke up I had the bottom left waiting for me. A couple of hours later my onions were oh so ready.

Once I had the onions were I wanted them I scooped some out into an ice cube tray to freeze and use later.

After I had the amount of onions I want left in my crockpot it was time for phase two. Add some fresh thyme leaves, garlic, salt, pepper, and unsalted beef stock, worcestershire sauce. And the most important thing to add is quality brandy instead of some grocery store sherry.

2%%y3HrVTeKT2u6rh+eQbw

Because I was taking this to a weekend getaway with a group of friends I packed it up into a zip lock bag and then warmed it up when it was time to serve.

q6kFxE0MSAqnvLkjNH6NXA

Ingredients:

  1. 8 largish onions
  2. 1-2 Tbsp of butter
  3. 1-2 Tbsp of olive oil
  4. 2-3 Tbsp of thyme leaves
  5. 2 boxes of unsalted beef stock
  6. Hefty splash of Brandy
  7. 2-3 Tbsp of minced garlic
  8. Salt and pepper to taste

Recipe:

  1. Add butter and olive oil into crockpot
  2. Thinly slice onions and place in crockpot. Cram them in if they don’t fit. They will shrink.
  3. Leave crockpot on low for approximately 12 hours. Stir every few hours.
  4. Take out any excess caramelized onions and freeze or refrigerate.
  5. Add in thyme leaves, unsalted beef stock, brandy, minced garlic, salt and pepper.
  6. Let simmer for another couple of hours until the flavors marry. Taste and adjust salt and pepper.
  7. Freeze or refrigerate once cool if eating later.
  8. If serving shred some fresh gruyere on top. Bake if you want or just let it melt into the soup on it’s own. Make sure there is some crusty bread for dipping!